Continuing on from Part 1 where we discussed how Nutanix can scale storage capacity separately to compute using storage only nodes, we will now cover how Nutanix can scale the storage performance of a Virtual server including beyond the capabilities of a single (scaled up) node.
Virtual machines, just like traditional physical servers benefit from having multiple storage controllers (e.g.: RAID controllers) and multiple drives regardless of their type (e.g.: HDD/SSD etc).
The same is true for VMs on Nutanix ADSF, more storage controllers and more virtual disks increase the storage performance.
For traditional hypervisors such as ESXi and Hyper-V, ensure you have the maximum four Paravritual SCSI controllers (PVSCSI) assigned to VM’s requiring the highest performance and low latency. Having multiple controllers means more queues are available to the virtual disks and therefore the less bottlenecks which can cause latency and inefficiency for the vCPUs assigned to the VM.
Because the benefits of multiple virtual SCSI adapters is so significant, Nutanix decided to ensure this functionality is achieved by default when using Nutanix’ next Generation Hypervisor, AHV with what is known as “Turbo Mode“.
This means virtual machines running on AHV are optimised by default at the virtual storage controller layer, removing the complexity for customers having to understand and configure virtual storage controllers.
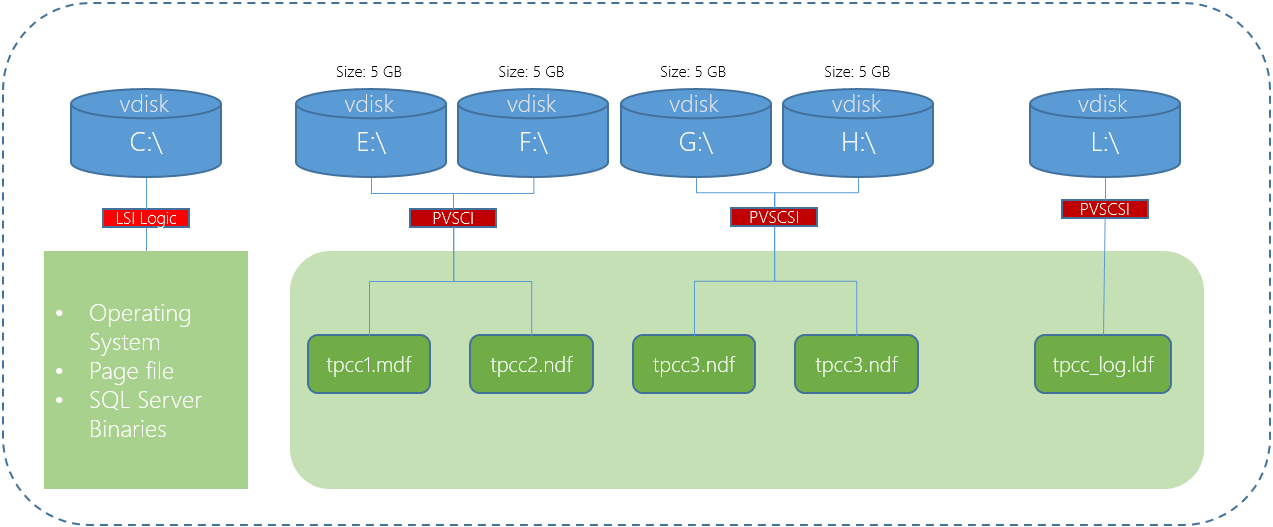
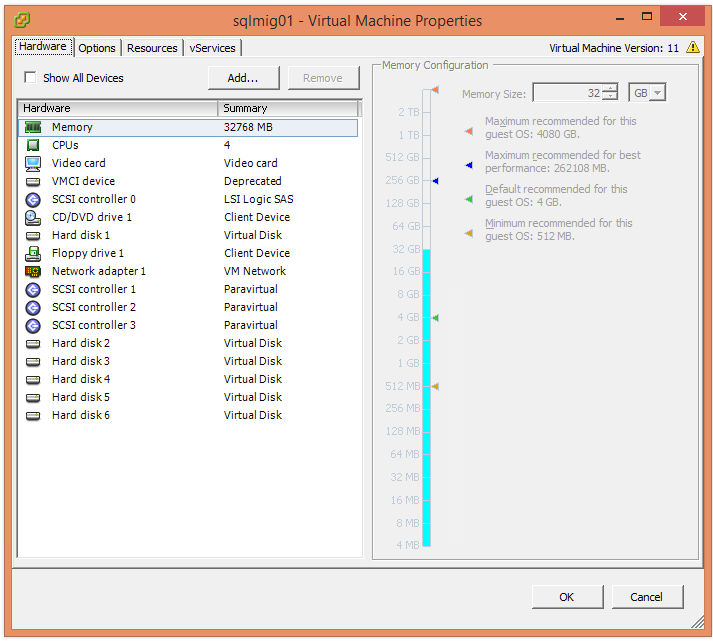
Regarding Virtual disks, for optimal performance you’ll need to use at least four assuming you’re using the recommended four Paravirtual SCSI controllers (i.e.: One per SCSI controller) but since we’re talking about scaling performance, let’s talk about more extreme examples.
Let’s say we have an MS Exchange server with 20 databases, the performance requirements for each database is typically in the range of hundred of IOPS, in which case I would recommend one virtual disk (e.g.: VMDK) per database and another for the logs.
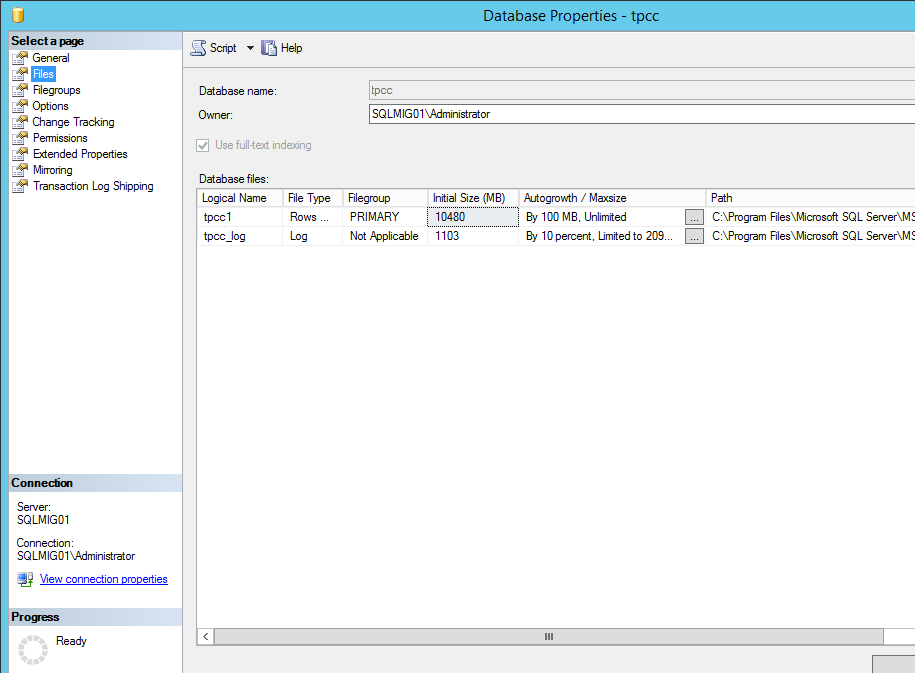
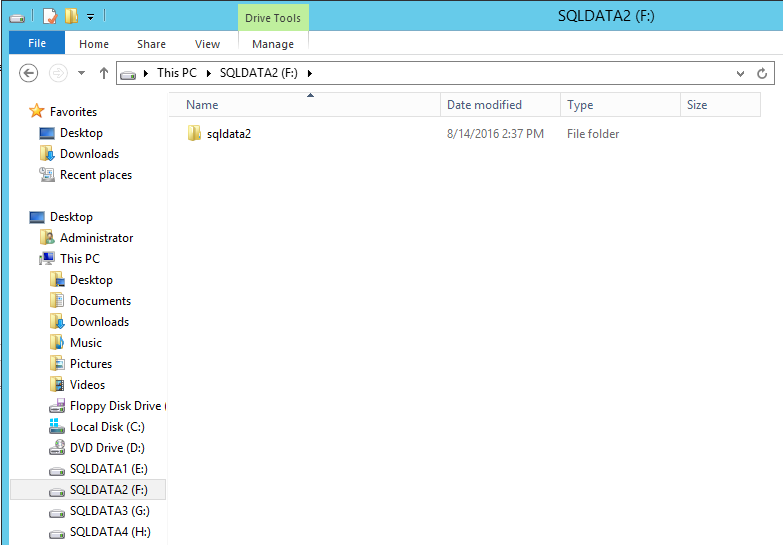
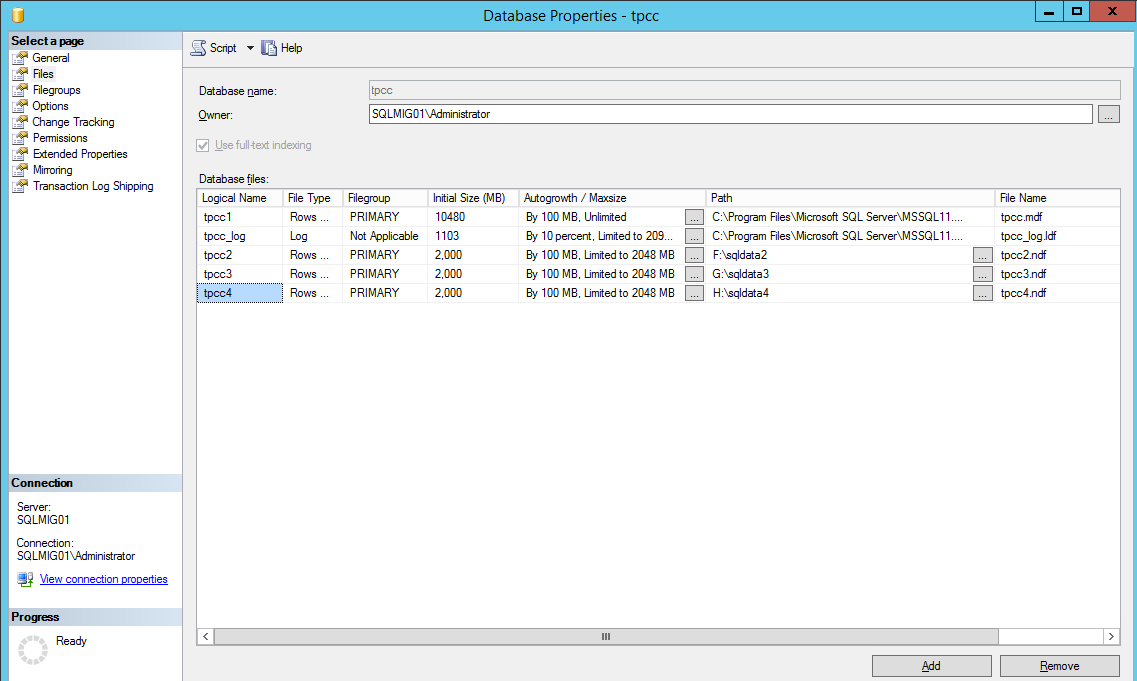
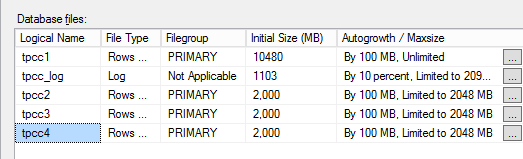
In the case of a large MS SQL server which may require tens or hundreds of thousands of IOPS to a single database, I recommend using multiple vDisks per database which involves Splitting SQL datafiles across multiple VMDKs to optimise VM performance.
In both examples, the virtual disks would be spread evenly across the four PVSCSI controllers if using ESXi or Hyper-V whereas AHV customers would just create the vDisks and each vDisk would by default enjoy a dedicated path direct to Nutanix ADSF’s I/O engine called “stargate”.
For more information about configuring virtual storage controllers and multiple virtual disks, see: SQL & Exchange performance in a Virtual Machine which goes through the process step by step.
At this stage we’ve learned to get optimal performance, we need to use multiple virtual disks regardless of hypervisor, and for traditional hypervisors (ESXi & Hyper-V) we need to assign/configure multiple PVSCSI adapters and spread out virtual disks evenly across them.
Let’s say you have a VM running a monster SQL workload, and the nodes/cluster has been sized correctly and the active working set (data) resides 100% in the SSD tier or it’s an all flash cluster.
The VM is also running on AHV enjoying Turbo Mode (or ESXi/Hyper-V with four PVSCSI controllers) and you’ve added 16 vDisks and spanned your database across the vDisks, BUT you still need more performance. What can we do next?
The good news is, Nutanix has lots of way’s to scale performance so let’s look at a few of them:
- Increase the vCPU of the Nutanix Controller VM (CVM)
This is rarely required, but it’s important to understand that Nutanix is just software running inside a VM, so simply increasing the vCPUs assigned to the CVM gives more available power to drive front end I/O as well as background cluster functionality.
The CVM automatically allows N-2 of the CVMs vCPUs to stargate (the I/O engine) which means if you add more vCPUs to the CVM, you will get more potential front and back end IO.
If your application performance is being impacted due to the local CVM being saturated (firstly, well done as this is very rare), but adding say 2 more vCPUs to the CVM may be enough to alleviate the bottleneck and give you much improved performance. I’ve seen this situation before and for the relatively low “cost” of 2 vCPUs, it can be well wroth it.
It’s important to note you can increase the vCPUs of just a single CVM, multiple CVMs or all CVMs within the cluster depending on your requirements and cluster design. e.g.: In a mixed cluster of nodes with 22c processors and 10c processors, you may move the critical VMs to the nodes with 22c processors and increase the CVM by 2vCPUs while leaving the nodes with the smaller 10c processors at default CVM size. This would deliver increased performance for the entire cluster while the most benefits would be felt on the 22c nodes.
For those interested in the Pros and Cons of the CVM and it’s use of host resources, please review: Cost vs Reward for the Nutanix Controller VM (CVM)
- Increase the vRAM of the Nutanix Controller VM (CVM)
Increasing the CVMs RAM is another quick and easy way to improve performance. The two main reasons adding RAM can improve performance is because part of the CVMs RAM acts as a read cache so depending on your application and dataset size, the additional read cache can make a huge difference.
The second reason is for CVM RAM allows additional medusa (metadata) cache which helps minimise read latency.
If you look at http://CVM_IP:2009/cache_stats (example below) and your “Range Cache Hit %” is 50%, Then you’re getting very good cache hits, whereas if it was just 5% then more RAM may result in significantly better read performance depending on the working set size.
The other critical factor for performance is the medusa cache. We want to see as close to 100% as possible for the “VDisk block map Cache Hit %” & “Extent group id map Cache Hit %”.

The above is an example of a system which has an optimal CVM RAM size for the working set as the Range Cache Hit % of 50% and the “VDisk block map Cache Hit %” & “Extent group id map Cache Hit %” are both sitting consistently at 100%.
The above cache and medusa hit rates are from a test cluster and it was achieving the following performance for a database checksum task (100% read).

The key here is the very low read latency which peaked at 0.35ms and sustained around 0.18ms over the course of several hours.
Signs of insufficient CVM RAM can be inconsistent read latency so if you’re observing this issue, review http://CVM_IP:2009/cache_stats and contact support for advise on CVM RAM sizing.
Note: There is no “harm” in adding more CVM RAM as long as the CVM is sized within a NUMA node to ensure memory performance remains optimal, the only impact is less available RAM for other Virtual Machines.
Let’s recap where we’re at:
The VM is on AHV enjoying Turbo Mode (or ESXi/Hyper-V with four PVSCSI controllers) with 16 vDisks and spanned your database across the vDisks. We’ve increased the CVM vCPUs and verified we have 100% hit rates for medusa and respectable 50% read cache hit rates, but we still need more performance, what else can we do?
- Add storage only nodes
The benefits of adding storage only nodes, especially to a busy cluster is not only immediate but obvious when we look at the total IOPS, read and write latency.
If you’ve not read my post titled “Scale out performance testing with Nutanix Storage Only Nodes” I will quickly recap it for you, but I recommend reading the full article.
In short, I ran an MS Exchange Jetstress workload on 4 VMs on an optimally configured 4 node hybrid (SSD+SATA) cluster and achieved the following results.

Observations from the baseline test:
- We achieved the desired >1000 IOPS per VM
- Performance was consistent across all Jetstress instances
- Log writes were in the 1ms range as they were serviced by the ADSF Oplog (persistent write buffer)
- Database reads were on average just under 10ms which is well below the Microsoft recommended 20ms
- The Database creation time averaged 2hrs 24mins
- The duplication of 3 databases averaged 4hrs 17mins
- The database checksum took on average around 38mins
I then added 4 more nodes to the cluster and without making any changes to the Jetstress, virtual machine/s or the cluster configuration and the IOPS jumped by 2x!!
The results for each of the four Jetstress VMs are shown below including the average across the VMs for each of the difference metrics.

In summary adding the 4 storage only nodes:
- Achieved IOPS jumped by almost 2x
- Log writes average latency was lower by 13%
- Database write latency dropped by >20%
- Database read latency dropped by almost 2x
- The Database creation time was just under 15 mins faster
- The duplication of 3 databases improved by almost 35 mins
- The database checksum was 40 seconds faster.
As we can see from these results, adding storage only nodes can significantly increase the performance without any tuning. Had I tuned the Jetstress configuration, much higher performance and potentially lower read/write latency could have also been achieved.
In short, adding storage only nodes is a quick win for performance with the added advantage of increasing the resiliency and capacity of the cluster.
So we’ve now achieved much higher performance for our workload thanks to a combination of optimally configured VM, CVM and the addition of storage only nodes.
If at this stage you’re still not achieving the performance you require, you’re in the 1% where we may need to utilise Acropolis Block Service (ABS) to further improve performance.
- Acropolis Block Services (ABS)
ABS was announced in 2016 to address the edge use cases as customers wanted to make Nutanix the standard platform for their datacenters, however they have not been able to realise this vision due to a number of reasons including:
- The desire/requirement to re-use existing servers
- Applications which are not virtual (for many reasons, mostly political)
- Performance / Scalability of externally connected servers
- Complexity including operational considerations of external iSCSI
For more detailed information about the release please review: What’s .NEXT 2016 – Acropolis Block Services (ABS)
ABS works by using In-guest iSCSI to present vDisks direct to the Guest OS. The vDisks are then automatically load balanced across the entire Nutanix cluster to provide optimal performance.
The below tweet answers the FAQ around how distributed is the workload when using ABS. As we see below, a 4 node cluster uses 4 paths and when the cluster is expanded to 8 nodes ABS automatically (and almost instantly) expands to use 8 paths (or CVMs).
How many #Nutanix CVMs service a single bare metal workload when using Acropolis Block Services?#HCI #FightTheFUD pic.twitter.com/yLUrSIaRYG
— Josh Odgers (@josh_odgers) August 7, 2016
The downside of ABS is the loss of data locality, but if we can’t have data locality, the next best thing is a highly scalable, resilient and dynamic distributed storage fabric.
ABS can scale performance in a linear manner which is only limited by the network bandwidth and number of nodes to drive the IO, so a physical server with say 100GB NICs and a cluster of 32 nodes would produce ridiculous levels of performance in the multi-millions of IOPS range.
The In-guest iSCSI setup is also very simple, just set the iSCSI Target as the Nutanix Cluster IP and the load balancing is dynamically calculated, when the cluster size increases, the vDisks are automatically balanced across the new nodes without user intervention, the same is true for node removals, maintenance, upgrades, failures etc. Everything is managed automatically so ABS is a very simple iSCSI implementation for admins.
Summary:
Nutanix provides excellent scalability for Virtual Machines and provides ABS for niche workloads which may require more performance than a single node can offer.
Up next, Part 4 where we cover the latest and most exciting development for scaling storage Performance for Monster VMs.
Back to the Scalability, Resiliency and Performance Index.