Nutanix Scalability – Part 4 – Storage Performance for Monster VMs with AHV!

In Part 3 we learned a number of ways to scale storage performance for a single VM including but not limited too:

  • Using multiple PVSCSI controllers
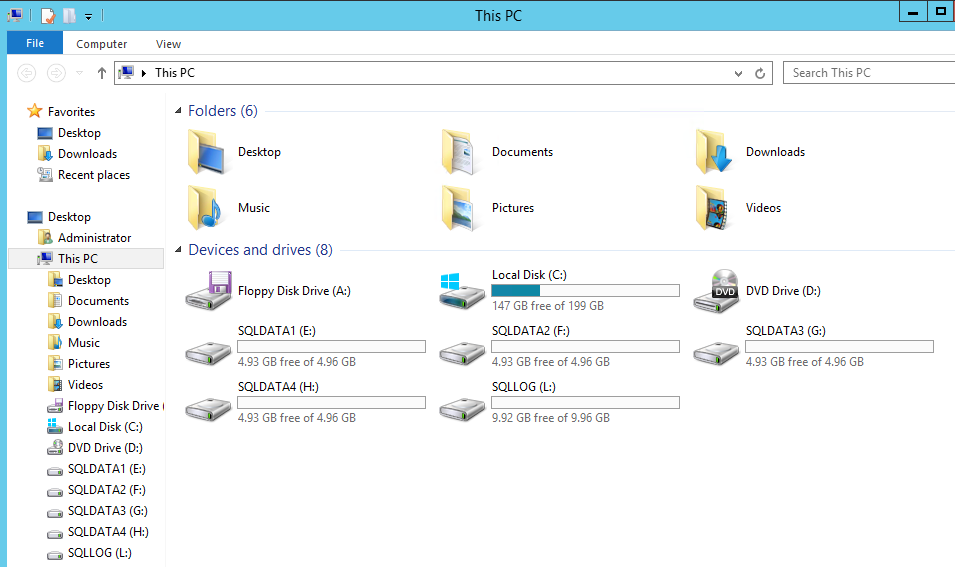
  • Using multiple virtual disks
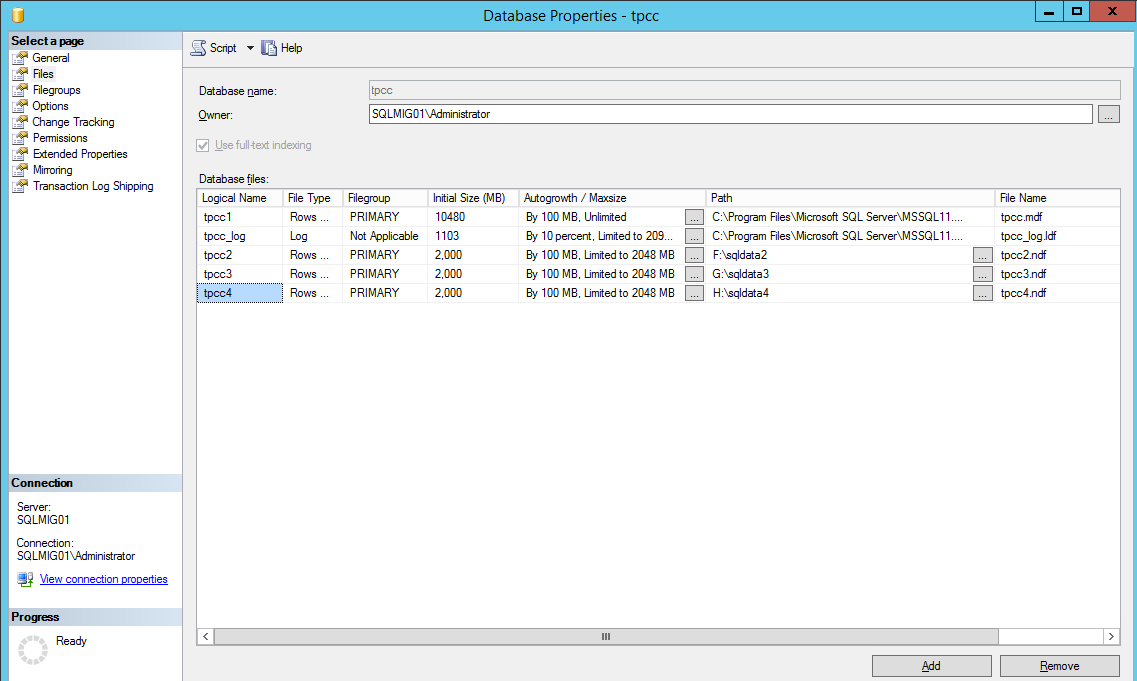
  • Spreading large workloads (like databases) across multiple vDisks/Controllers
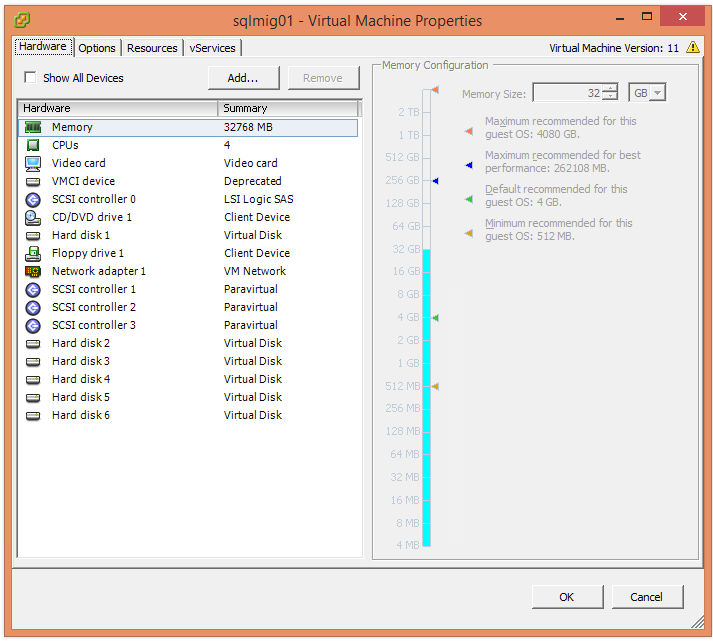
  • Increasing the CVMs vCPUs and/or vRAM
  • Adding storage only nodes
  • Using Acropolis Block Services (ABS)

Now here at Nutanix, especially in the Solutions/Performance engineering team we’re never satisfied and we’re always pushing for more efficiency which leads to greater performance.

A colleague of mine, Michael Webster (NPX#007 and VCDX#66) was a key part of the team who designed and developed what is now known as “Volume Group Load Balancer” or VG LB for short.

Volume Group Load Balancer is an Acropolis Hypervisor (AHV) only capability which combines the IO path efficiencies of AHV Turbo Mode with the benefits of the Acropolis Distributed Storage Fabric (ADSF) to create a more simplified and dynamic version of Acropolis Block Services (ABS).

One major advantage of VG LB over ABS is it’s simplicity.

There is no requirement for in-guest iSCSI which removes the potential for driver and configuration issues and VG LB is configured through PRISM UI by using the update VM option making it a breeze to setup.

UpdateVMwVG

The only complexity with VG LB currently is to enable the load balancing functionality, it needs to be applied at the Acropolis CLI (acli) using the following command:

acli vg.update Insert_vg_name_here load_balance_vm_attachments=true

In the event you do not wish all Controller VMs to provide IO for VG LB, one or more CVMs can be excluded from load balancing. However I recommend leaving the cluster to sort itself out as the Acropolis Dynamic Scheduler (ADS) will move virtual disk sessions if CVM contention is discovered.

iSCSI sessions are also dynamically balanced as workload on individual CVMs exceed 85% to ensure hot spots are quickly alleviated which is another reason why CVMs should not be excluded as you are likely constraining performance for the VG LB VM unnecessarily.

VG LB is how Nutanix has achieved >1 MILLION 8k random read IOPS at just 0.11ms latency from a single VM as shown below.

This was achieved using just a 10 node cluster, imagine what can be achieved when you scale out the cluster further.

A Frequently asked question relating to high performance VMs is what happens when you vMotion?

The link above shows this in detail including a YouTube demonstration, but in short the IO dropped below 1 million IOPS for approx 3 seconds during the vMotion with the lowest value recorded at 956k IOPS. I’d say an approx 10% drop for 3 seconds is pretty reasonable as the performance drop is caused by the migration stunning the VM and not by the underlying storage.

The next question is “What about mixed read/write workloads?

Again the link above shows this in detail including a YouTube demonstration, but at this stage you’re probably not surprised that this result shows a maximum starting baseline of 436K random read and 187k random write IOPS and immediately following the migration performance reduced to 359k read and 164k write IOPS before achieving greater performance than the original baseline @ 446k read and 192k IOPS within a few seconds.

So not only can Nutanix VG LB achieve fantastic performance, it can do so during normal day to day operations such as VM live migrations.

The VG LB capability is unique to Nutanix and is only achievable thanks to the true Distributed Storage Fabric.

With Nutanix highly scalable software defined storage and the unique capabilities like storage only nodes, AHV Turbo and VG LB, the question “Why?” seriously needs to be asked of anyone recommending a SAN.

I’d appreciate any constructive questions/comments on use cases which you believe Nutanix cannot handle and I’ll follow up with a blog post explaining how it can be done, or I’ll confirm if it’s not currently supported/recommended.

Summary:

Part 3 has taught us that Nutanix provides excellent scalability for Virtual Machines and provides ABS for niche workloads which may require more performance than a single node can offer while Part 4 explains how Nutanix’ next generation hypervisor (AHV) provides further enhanced and simplified performance for monster VMs with Volume Group Load Balancing leveraging Turbo Mode.

Back to the Scalability, Resiliency and Performance Index.

Nutanix gets Microsoft blessing for unique ESRP for a real world MS Exchange ESRP solution on All Flash

I am pleased to announce that Microsoft have approved Nutanix latest ESRP (Exchange Storage Review Program) submission for a 50,000 user deployment of MS Exchange on Nutanix NX-8150 all flash platform running the next generation hypervisor, AHV!

What’s unique about this you might ask?

  1. It’s the first hyper-converged (HCI) all flash ESRP solution (to compliment Nutanix existing Hybrid ESRP solutions for 24k users on Hyper-V and 30k users on AHV)
  2. The first multiple Exchange VM per node solution!!
  3. The first ESRP to provide MS Exchange Server role requirements calculator solution design
  4. The solution was performance tested/validated with N-1 nodes to simulate performance in the event a node had failed and was not replaced
  5. The solution supports the 1GB mailboxes without any assumed data reduction from compression, deduplication or Erasure Coding (EC-X)

The last point is key. Many vendors/solutions assume high data reduction ratios when sizing which adds risk to a project as I explained in Sizing infrastructure based on vendor Data Reduction assumptions. Nutanix (and me personally) rather give customers a guaranteed business outcome and while our data reduction is very effective especially for MS Exchange data, it can and does vary between customers. An ESRP should be a guaranteed outcome, and that’s what this unique ESRP from Nutanix delivers.

A major problem with many, if not most ESRP submissions is that they are not real world solutions, just storage platforms which can deliver high enough IOPS to potentially support a real world solution.

When designing the solution I planned to put forward for ESRP, I used an actual real world design for a Nutanix customer and ensures it was sized to be 100% real world.

For example, from a compute perspective the solution was sized with no CPU overcommitment and within the recommended maximum of 24 CPUs both of which ensure optimal CPU performance.

CPU sizing also ensures Exchange VMs fit within the NUMA node of the Nutanix node which ensures optimal memory performance, which is another key area to ensure optimal Exchange performance.

In addition, The VMs are sized to be under the Microsoft recommended CPU utilization threshold for a “Worst Failure Mode” of ≤ 80 percent.

From a real world perspective, MS Exchange is dependant on Active Directory. As a result the solution is also sized to support all the required Active Directory Global Catalog cores running on the same infrastructure.

From an availability and resiliency perspective, the solution is sized for N+1 at the infrastructure layer to compliment the N+1 at the MS Exchange DAG layer. This delivers customers a solution which has protection from multiple concurrent failures which is essential for Mission Critical applications.

In the real world, things change and having a solution which scales to support more users, more messages per day and greater mailbox capacity is essential.

The Nutanix NX-8150 All Flash ESRP discusses a scalable and repeatable model where the solution can be increased in size from supporting 1 GB mailboxes to >2 GB simply by choosing (configure to order) 3.84 TB drives vs. the 1.92 TB drives tested for this solution.

Another option is when the storage capacity is reaching a high threshold such as 80%+, customers can non disruptively add storage nodes to expand capacity. This can be done without any change at the OS or MS Exchange application layer and new capacity (and performance!) is available instantly.

Did you know Nutanix allows mixing all-flash & hybrid? This means the most active data (e.g.: Most recent email) is running in an all flash configuration and older mail is automatically and transparently migrated to the lower cost hybrid nodes.

From a storage performance perspective, the solution was tested with in-line compression enabled which is Nutanix official recommendation for MS Exchange as it provides excellent data reduction with no significant overheads.

Another focus are for Nutanix in the real world is reducing CAPEX and OPEX. A great example of this is the entire solution (excluding networking) uses just 10 rack units (RUs) per datacenter. While other vendors storage ESRPs will claim lower RU requirements, they excluding the physical servers required for the solution. Nutanix is advising the requirements for the compute and storage for the solution to be totally transparent.

This means the solution does not require a large investment in your datacenter or co-location and is cost effective to power and cool making the solution environmentally friendly as well.

From a performance perspective, the Nutanix solution was tested in an N-1 configuration to show the performance which can be achieved after the failure of a node within the cluster.

Even with a failed node, the solution achieves excellent performance with average database read and log write latency in the low 1ms range sustained for the 24 stress test required for ESRP submissions.

A few performance highlights:

  1. Nutanix achieved an average of 5172 IOPS per MS Exchange Jetstress instance with just 4 threads!
  2. Database read latency avg of just 1.05ms
  3. Log write latency avg of just 1.21ms
  4. Database backup performance of 215MB/sec per database which equates to more than 1.7GBps per node!

While the achieved performance vastly exceeds the requirements for Exchange, the key factor is the reduced CPU WAIT time achieved which results in much greater CPU efficiency than a physical Exchange server with JBOD storage. Meaning a virtualised exchange server on Nutanix (even hybrid systems) is more efficient than Microsoft Preferred architecture using physical servers and JBOD storage.

You may be asking yourself, why does this matter? The answer is simple. MS Exchange becomes inefficient when scaled up beyond 24 cores so the more efficient the usage of those cores, the more users, messages per day and better user experience can be achieved without scaling up or adding more servers.

So without further delay, I have provided the direct link to the document below for you convenience.

Nutanix ESRP – NX-8150-G5 All Flash 50,000 Users

ntnxallflashesrp

Splitting SQL datafiles across multiple VMDKs for optimal VM performance

After recently helping multiple customers resolve performance issues with vBCA workloads by configuring multiple PVSCSI adapters and spreading workloads across multiple VMDKs, I wrote: SQL and Exchange performance in a virtual machine.

The post talked about how you should use multiple PVSCSI adapters with multiple VMDKs spread evenly across the adapters to achieve optimal performance and reduce overheads.

But what about if you only have a single SQL database. Can we split it across multiple VMDKs and importantly, can we do this without downtime?

The answer to both, thankfully is Yes!

The below is an example of a worst case scenario for a SQL server database. A single VMDK (using a single SCSI controller) hosting the Operating System, Database and Logs, especially when it’s a business critical application.

In the above scenario the single virtual SCSI controller and/or the single VMDK could both result in lower than expected performance.

We have learned earlier that using multiple PVSCSI adapters and VMDKs is the best way to deploy a high performance solution. The below is an example deployment where the OS , Pagefile and SQL binaries are using one virtual controller and VMDK, then four VMDKs for database files are hosted by a further two PVSCSI controllers and the logs are hosted by a fourth PVSCSI controller and VMDK.

In the above diagram the C:\ is using a LSI Logic controller which in most cases does not constraint performance, however since it’s very easy to change to a PVSCSI controller and there are no significant downsides, I recommend standardizing on PVSCSI.

Now if we look at our current database, we can see it has one database file and one log file as shown below.

The first step is the update the Virtual machines disk layout as describe in the aforementioned article which should end up looking like the below:

Next we go into Disk manager to rescan for the new storage devices, mark the drives are online, then format them with a 64k Allocation size which is optimal for databases. Once this is done you should check My Computer and see something similar to the below:

Next I recommend creating a directory for the database and log files rather than using the root directory so each drive should have a new folder as per the example below.

Next step is to create the new database files on each of new drives as shown below.

If the size of the original database is for example 10GB with say 2GB free space and you plan to split the database across 4 drives, then each of the new databases should be sized at no more than 2GB each to begin with. This prepares us to shrink the original DB and helps ensure the data is evenly spread across the new database files.

In the above screenshot, we can see the databases are limited to 2000MB, this is on purpose as we don’t want the database files expanding which can result in an uneven spread of data during the redistribution process I will cover later.

Switch the Recovery mode of Database to SIMPLE

Now go to the database, navigate to Tasks, Shrink and select “Files”

Now select the “Empty File by migrating data to other files in the same filegroup” option and press “Ok”.

Depending on the size of the database and the speed of the storage this may take some time and it will have at least some impact on the performance of the server. As such I recommend performing the process outside of peak hours if possible.

The error below is expected as we do not want to empty out the first *.mdf file completely. This is also an indication of our tasks being complete for empty file operation to the limit we’ve set earlier.

Once the task has completed you should see a roughly even distribution of data across the four database files by using the script below in query window.

USE tpcc
GO
SELECT DB_NAME() AS DbName,
name AS FileName,
size/128.0 AS CurrentSizeMB,
size/128.0 - CAST(FILEPROPERTY(name, 'SpaceUsed') 
AS INT)/128.0 AS FreeSpaceMB
FROM sys.database_files;

C:\Users\Kasim\AppData\Local\Temp\SNAGHTMLd751ece.PNG

Next we want to configure autogrow onto our databases so they can grow during business as usual operations.

The above shows the database are configured to autogrow by 100MB up to a limit of 2048MB each. The amount a database should autogrow will vary based on the rate of growth in your database, as will the file size limit so consider these values carefully.

Once you have set these settings it’s now time to shrink the original final to the same size as the other database files as shown below:

This process cleans up white space (empty space) within the database.

So far we have achieved the following:

  1. Updated the VM with additional PVSCSI controllers and more VMDKs
  2. Initialized the VMDKs and formatted to the Guest OS
  3. Created three new database files
  4. Balanced the database across the four database file (including the original file)

We have achieved all of this without taking the database offline.

At this stage the virtual machine and SQL can be left as is until such time as you can schedule a short maintenance window to perform the following:

  1. Copy the original DB file from C: to the remaining new database VMDK
  2. Copy the original Logs file from C: to the new logs VMDK

This process only takes a few minutes plus the time to copy the database and logs. The duration of the file copy will depend on the size of your database and the performance of the underlying storage. The good news is with the virtual machine having already been partially optimized with more PVSCSI controllers and VMDKs, the read (copy) process will be served by one SCSI controller/VMDK and the paste (write) process served by another which will minimize the downtime required.

Once you have locked in your maintenance window, all you need to do is ensure all users and applications dependent on the database are shutdown, then detach the database and select the “Drop Connections” and “Update Statistics” and press Ok.


The next steps are very simple; we need to copy (or rather move/cut) the database from the original location as shown below:

Now we paste the database file to the new data1 drive.

Then we copy the log file and paste it into the new log drive.

Now we simply reattach the database specifying the new location of the *.mdf file. You will note the message highlighted below which indicates the log files are not found which is expected since we have just relocated them.

C:\Users\Kasim\AppData\Local\Temp\SNAGHTMLd8094b4.PNG

To resolve this simply update the path to the logs file as shown below and press Ok.

And we’re done! Simple as that.

Adjust the maximum growth of the datafile to an appropriate size. If you set to unlimited, please ensure that you monitor the volumes and manage them according to the growth rate of the database.

Lastly, don’t forget to change the database recovery model to Full

Now you have your OS separated from your SQL database and logs and all of the drives are configured across four virtual SCSI controllers.

Summary:

If you have an existing SQL server and storage performance is considered a problem, before buying new storage (Nutanix or otherwise), ensure you optimize the virtual machines storage layout as the constraint may not be the underlying storage.

As this post explains, most of this optimization can be done without taking the database offline so you don’t really have anything lose in following this process. Worst case scenario is performance does not improve and you have eliminated the VM storage as the constraining factor and when you do implement new Nutanix nodes or any underlying storage, you will get the most out of it. Do follow some other best practices like RAM to vCPU balancing, SQL Memory optimization, Trace Flags and database compression, be it row or page.

Acknowledgements:

A huge thank you to Kasim Hansia from the Nutanix Business Critical Applications (vBCA) team for documenting this process and allowing me to publish this post using his screenshots. It’s a pleasure working with such a talented group at Nutanix both in the vBCA team and in the broader organization.

Related Articles:

  1. SQL and Exchange performance in a virtual machine
  2. How to successfully virtualize Microsoft Exchange
  3. MS support for SQL on NFS datastores