After recently helping multiple customers resolve performance issues with vBCA workloads by configuring multiple PVSCSI adapters and spreading workloads across multiple VMDKs, I wrote: SQL and Exchange performance in a virtual machine.
The post talked about how you should use multiple PVSCSI adapters with multiple VMDKs spread evenly across the adapters to achieve optimal performance and reduce overheads.
But what about if you only have a single SQL database. Can we split it across multiple VMDKs and importantly, can we do this without downtime?
The answer to both, thankfully is Yes!
The below is an example of a worst case scenario for a SQL server database. A single VMDK (using a single SCSI controller) hosting the Operating System, Database and Logs, especially when it’s a business critical application.
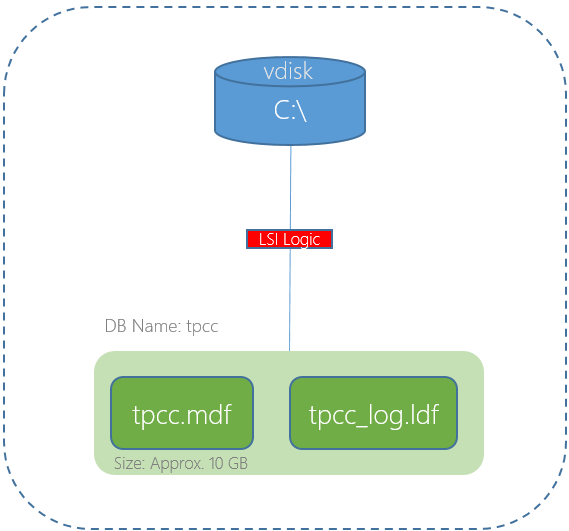
In the above scenario the single virtual SCSI controller and/or the single VMDK could both result in lower than expected performance.
We have learned earlier that using multiple PVSCSI adapters and VMDKs is the best way to deploy a high performance solution. The below is an example deployment where the OS , Pagefile and SQL binaries are using one virtual controller and VMDK, then four VMDKs for database files are hosted by a further two PVSCSI controllers and the logs are hosted by a fourth PVSCSI controller and VMDK.
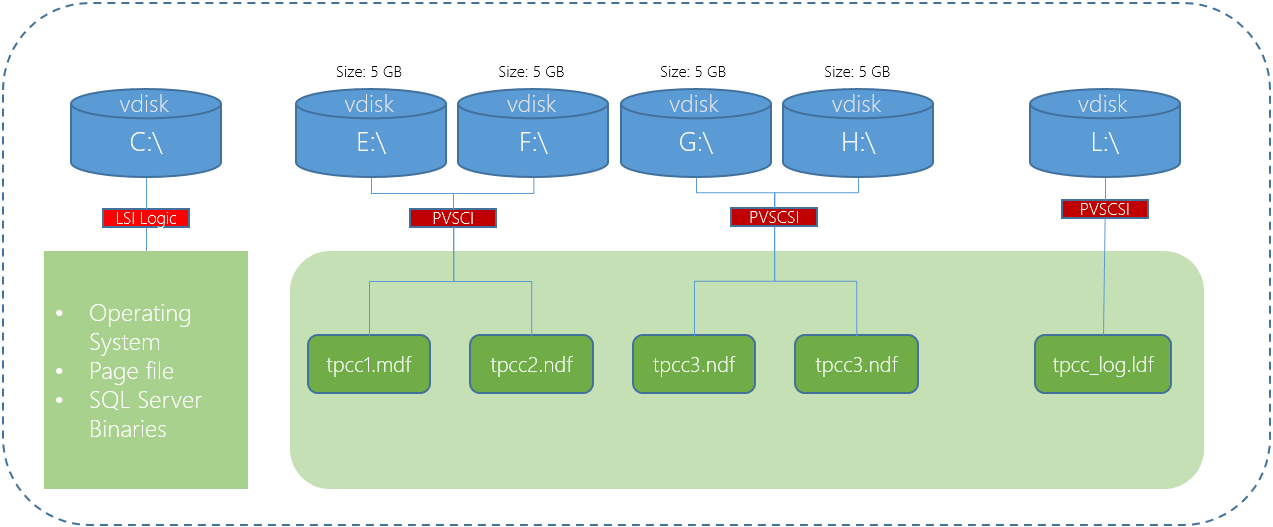
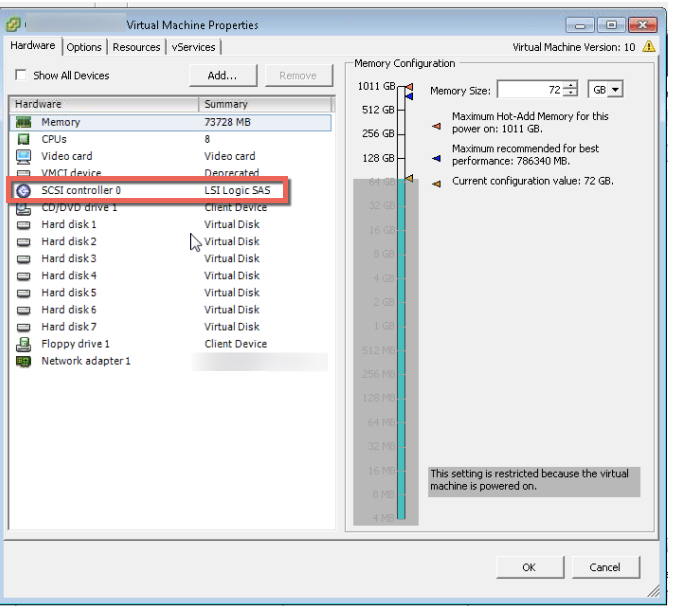
In the above diagram the C:\ is using a LSI Logic controller which in most cases does not constraint performance, however since it’s very easy to change to a PVSCSI controller and there are no significant downsides, I recommend standardizing on PVSCSI.
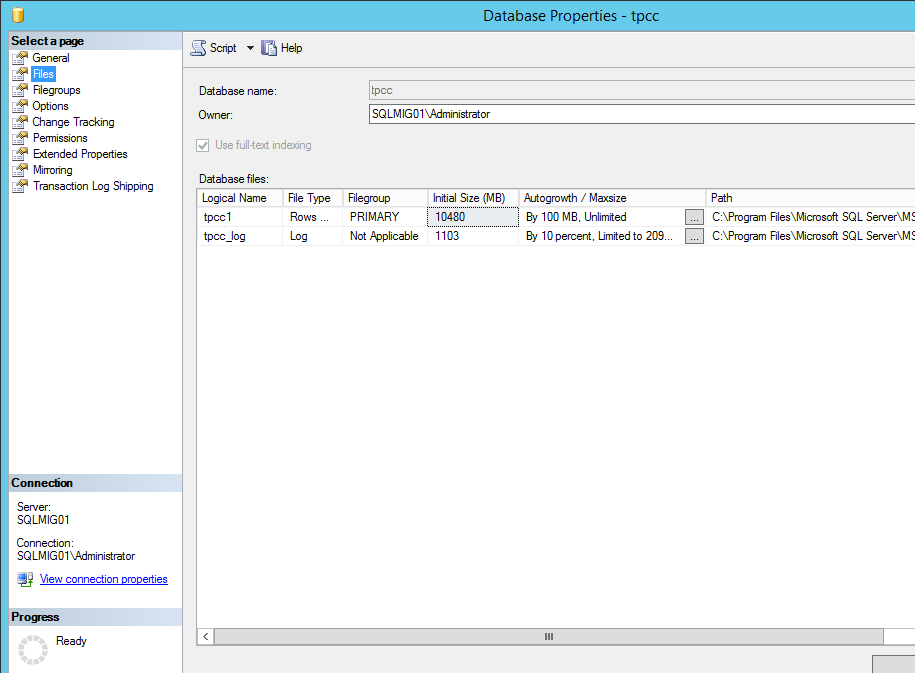
Now if we look at our current database, we can see it has one database file and one log file as shown below.
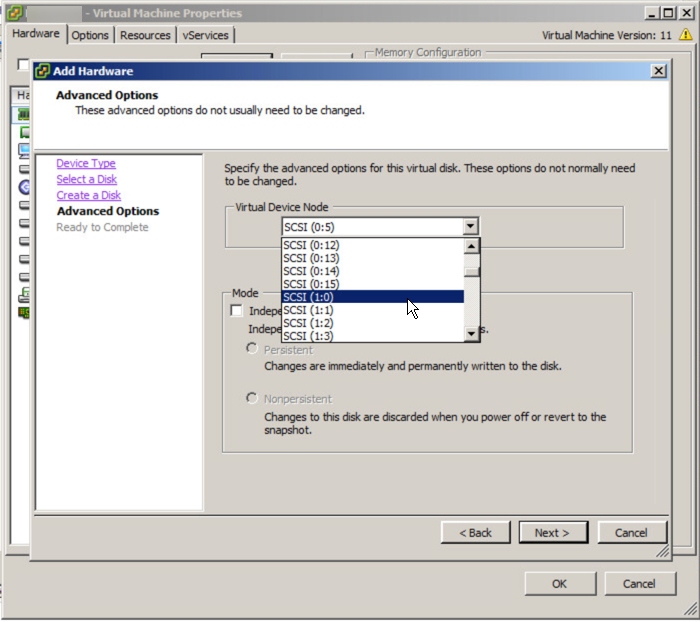
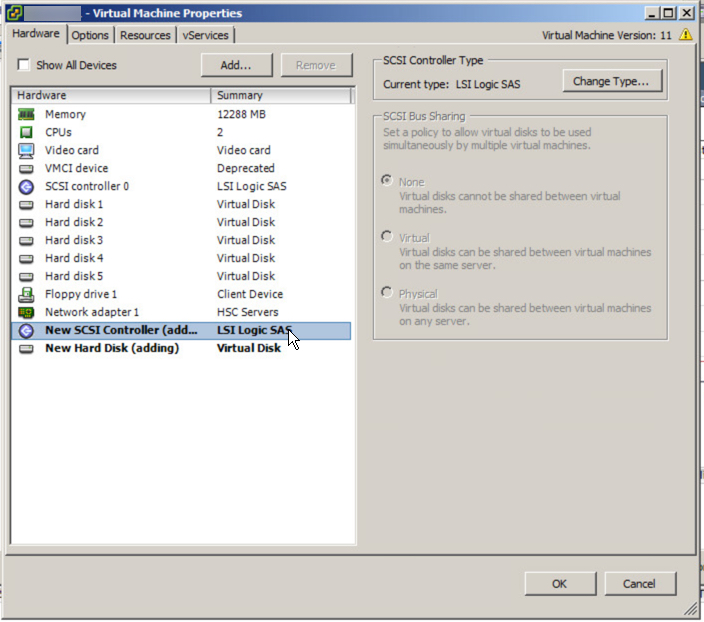
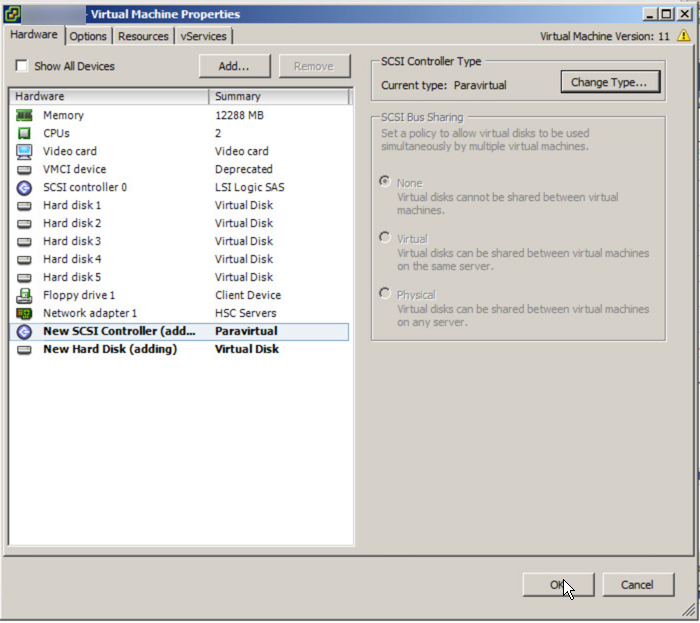
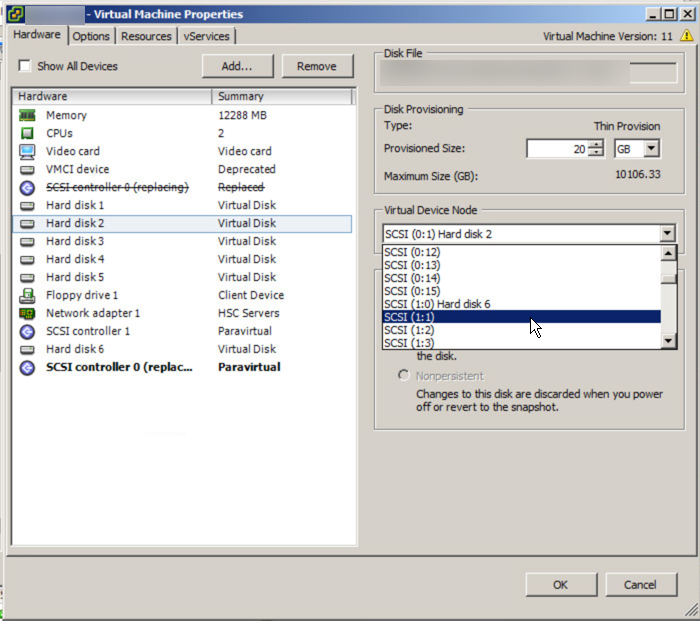
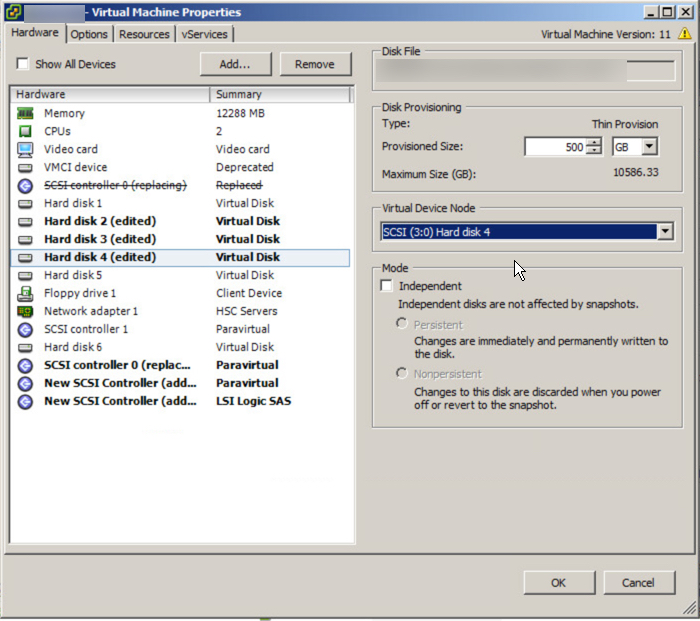
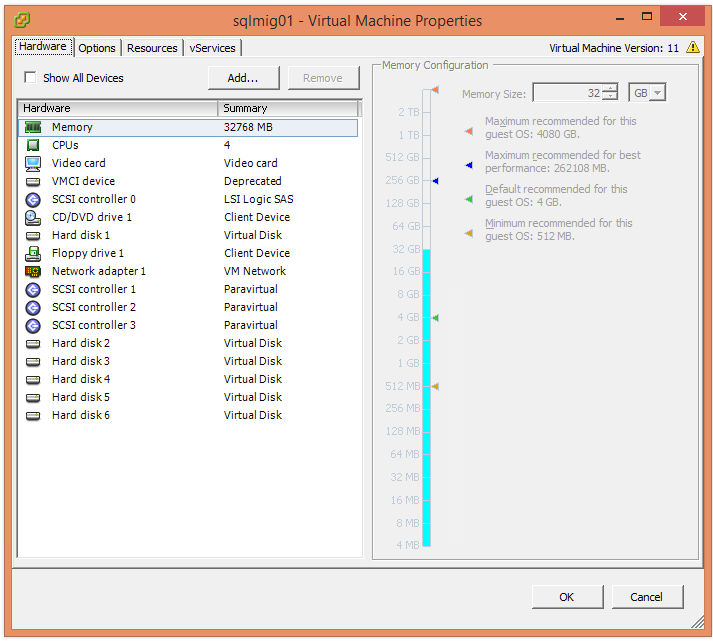
The first step is the update the Virtual machines disk layout as describe in the aforementioned article which should end up looking like the below:
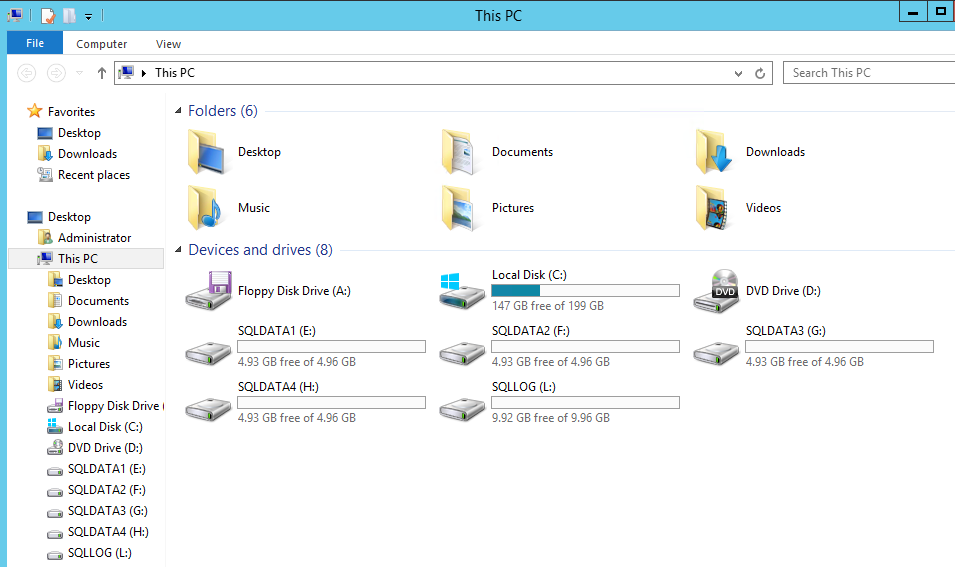
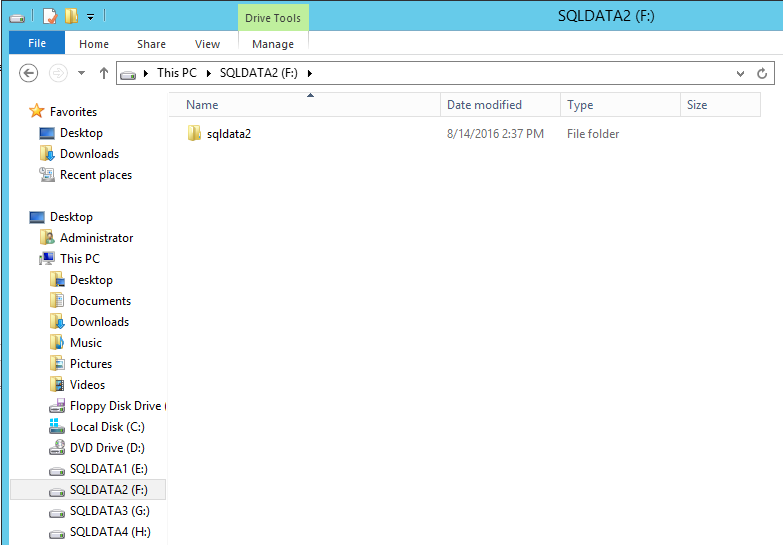
Next we go into Disk manager to rescan for the new storage devices, mark the drives are online, then format them with a 64k Allocation size which is optimal for databases. Once this is done you should check My Computer and see something similar to the below:
Next I recommend creating a directory for the database and log files rather than using the root directory so each drive should have a new folder as per the example below.
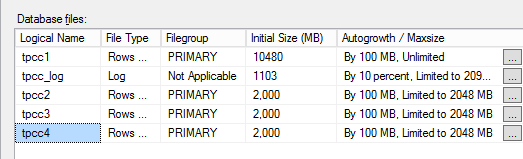
Next step is to create the new database files on each of new drives as shown below.
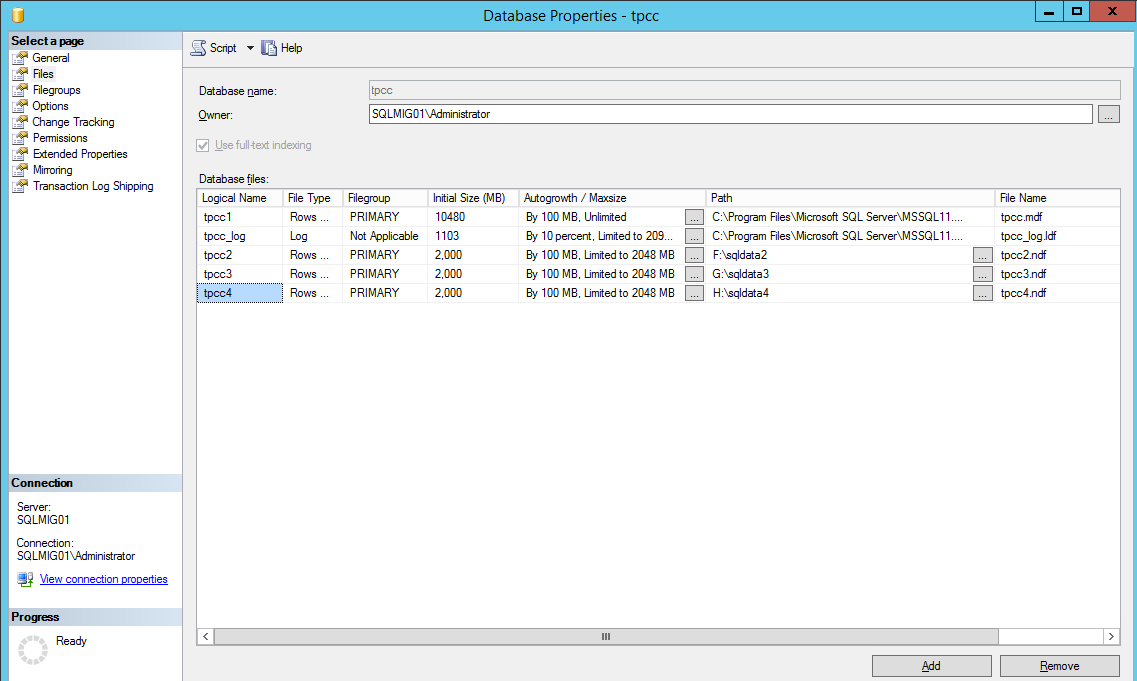
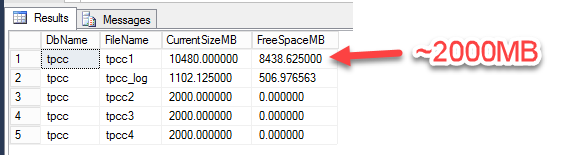
If the size of the original database is for example 10GB with say 2GB free space and you plan to split the database across 4 drives, then each of the new databases should be sized at no more than 2GB each to begin with. This prepares us to shrink the original DB and helps ensure the data is evenly spread across the new database files.
In the above screenshot, we can see the databases are limited to 2000MB, this is on purpose as we don’t want the database files expanding which can result in an uneven spread of data during the redistribution process I will cover later.
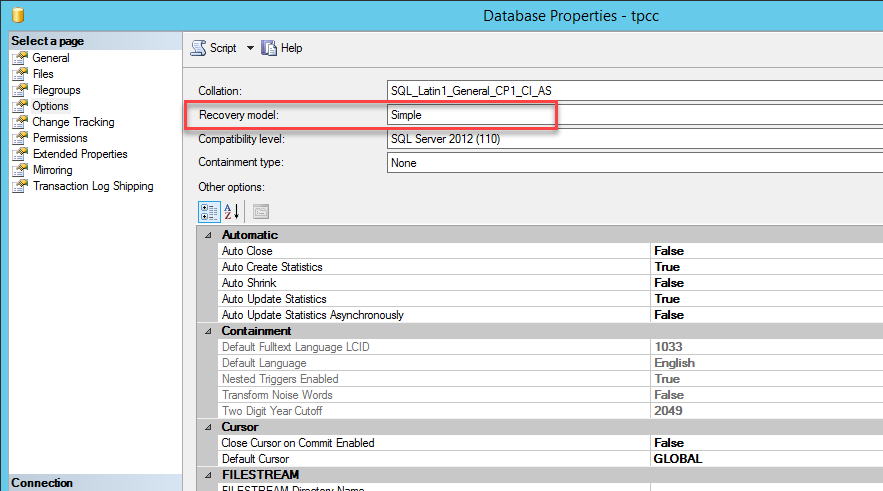
Switch the Recovery mode of Database to SIMPLE
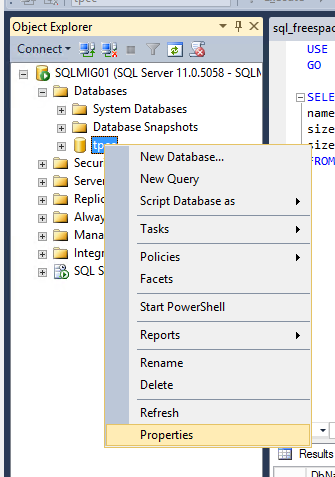
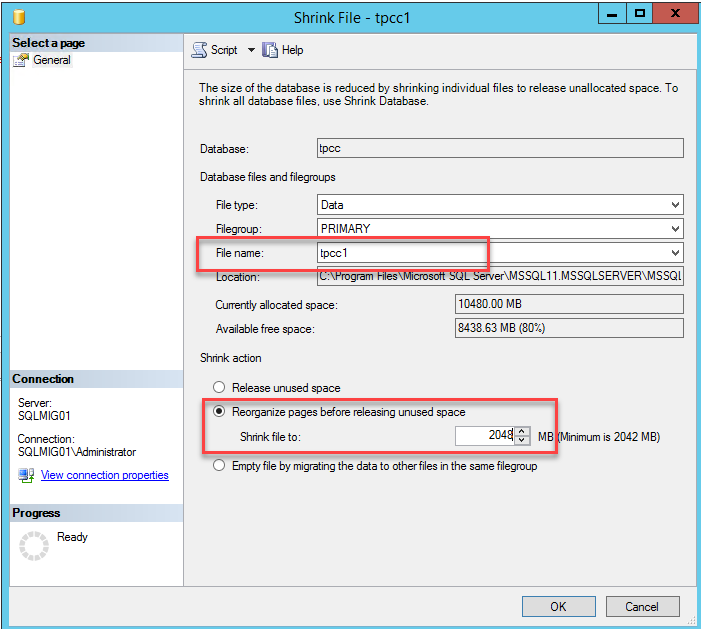
Now go to the database, navigate to Tasks, Shrink and select “Files”
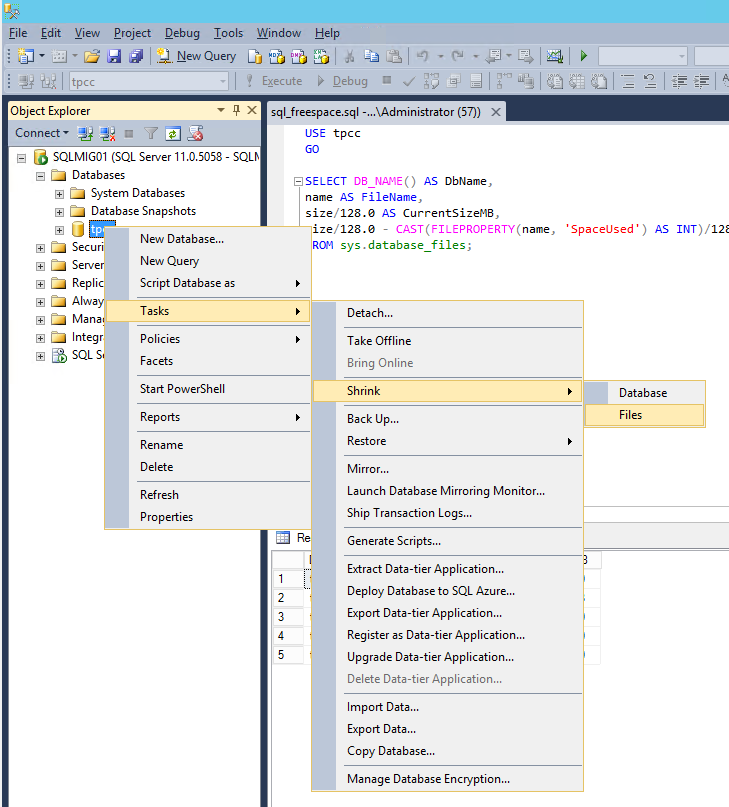
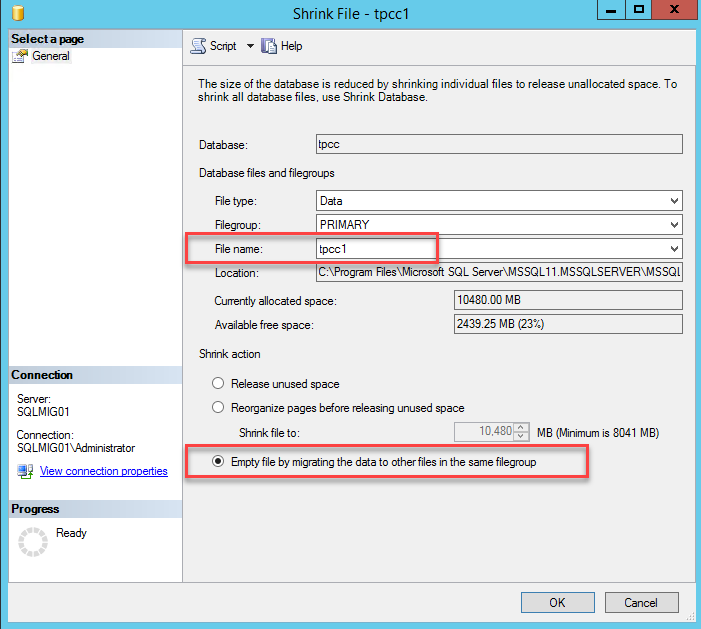
Now select the “Empty File by migrating data to other files in the same filegroup” option and press “Ok”.
Depending on the size of the database and the speed of the storage this may take some time and it will have at least some impact on the performance of the server. As such I recommend performing the process outside of peak hours if possible.
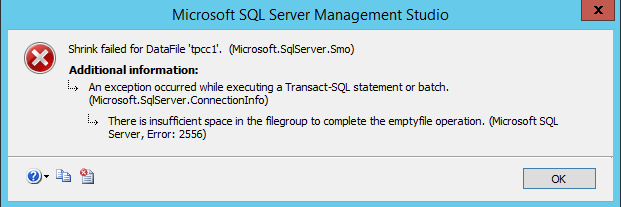
The error below is expected as we do not want to empty out the first *.mdf file completely. This is also an indication of our tasks being complete for empty file operation to the limit we’ve set earlier.
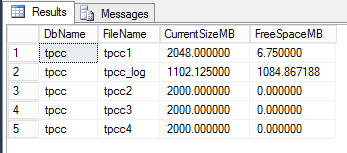
Once the task has completed you should see a roughly even distribution of data across the four database files by using the script below in query window.
USE tpcc
GO
SELECT DB_NAME() AS DbName,
name AS FileName,
size/128.0 AS CurrentSizeMB,
size/128.0 - CAST(FILEPROPERTY(name, 'SpaceUsed')
AS INT)/128.0 AS FreeSpaceMB
FROM sys.database_files;
Next we want to configure autogrow onto our databases so they can grow during business as usual operations.
The above shows the database are configured to autogrow by 100MB up to a limit of 2048MB each. The amount a database should autogrow will vary based on the rate of growth in your database, as will the file size limit so consider these values carefully.
Once you have set these settings it’s now time to shrink the original final to the same size as the other database files as shown below:
This process cleans up white space (empty space) within the database.
So far we have achieved the following:
- Updated the VM with additional PVSCSI controllers and more VMDKs
- Initialized the VMDKs and formatted to the Guest OS
- Created three new database files
- Balanced the database across the four database file (including the original file)
We have achieved all of this without taking the database offline.
At this stage the virtual machine and SQL can be left as is until such time as you can schedule a short maintenance window to perform the following:
- Copy the original DB file from C: to the remaining new database VMDK
- Copy the original Logs file from C: to the new logs VMDK
This process only takes a few minutes plus the time to copy the database and logs. The duration of the file copy will depend on the size of your database and the performance of the underlying storage. The good news is with the virtual machine having already been partially optimized with more PVSCSI controllers and VMDKs, the read (copy) process will be served by one SCSI controller/VMDK and the paste (write) process served by another which will minimize the downtime required.
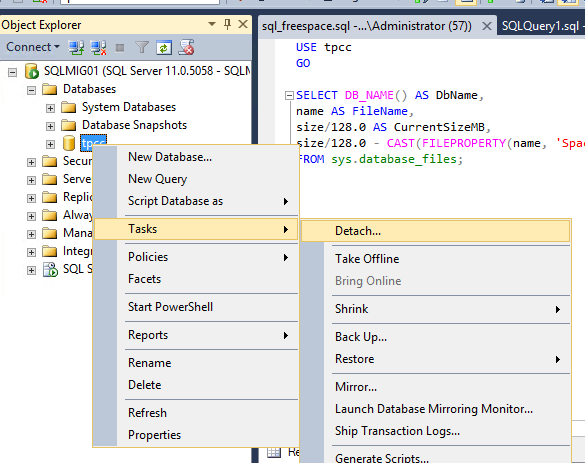
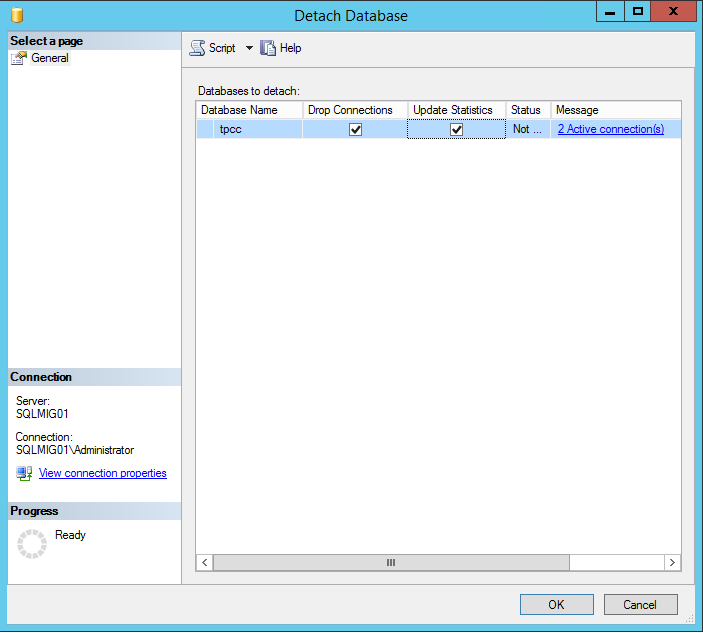
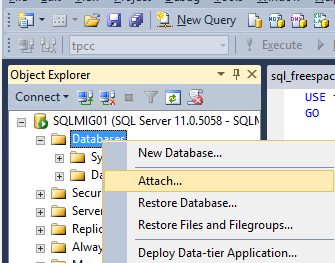
Once you have locked in your maintenance window, all you need to do is ensure all users and applications dependent on the database are shutdown, then detach the database and select the “Drop Connections” and “Update Statistics” and press Ok.
The next steps are very simple; we need to copy (or rather move/cut) the database from the original location as shown below:
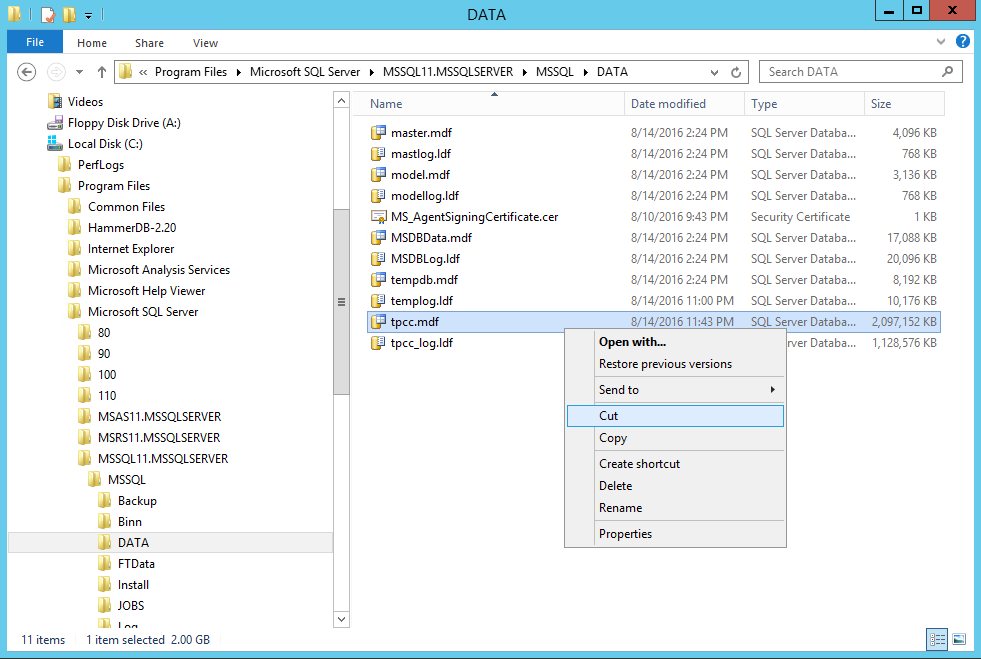
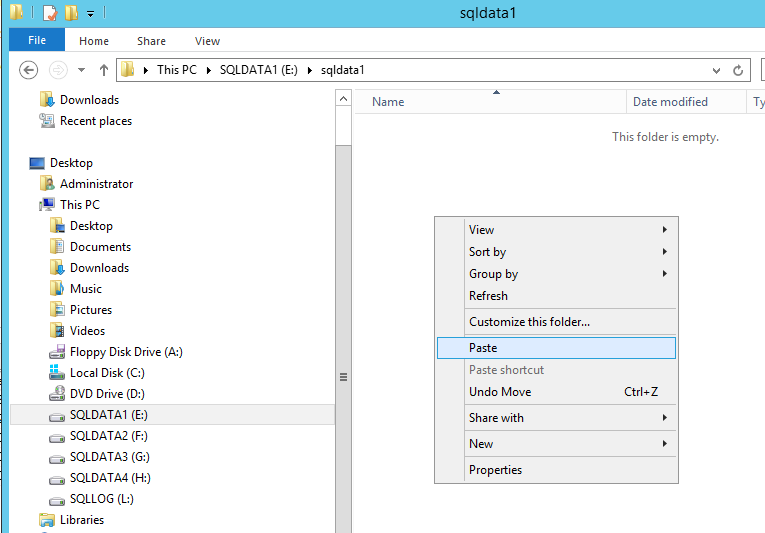
Now we paste the database file to the new data1 drive.
Then we copy the log file and paste it into the new log drive. 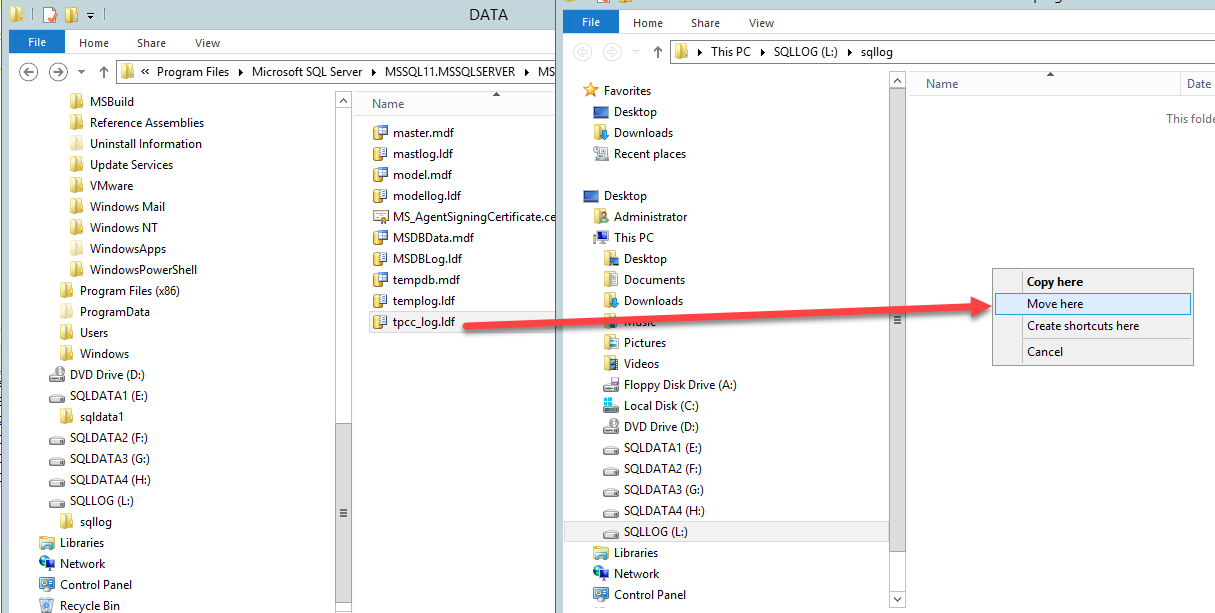
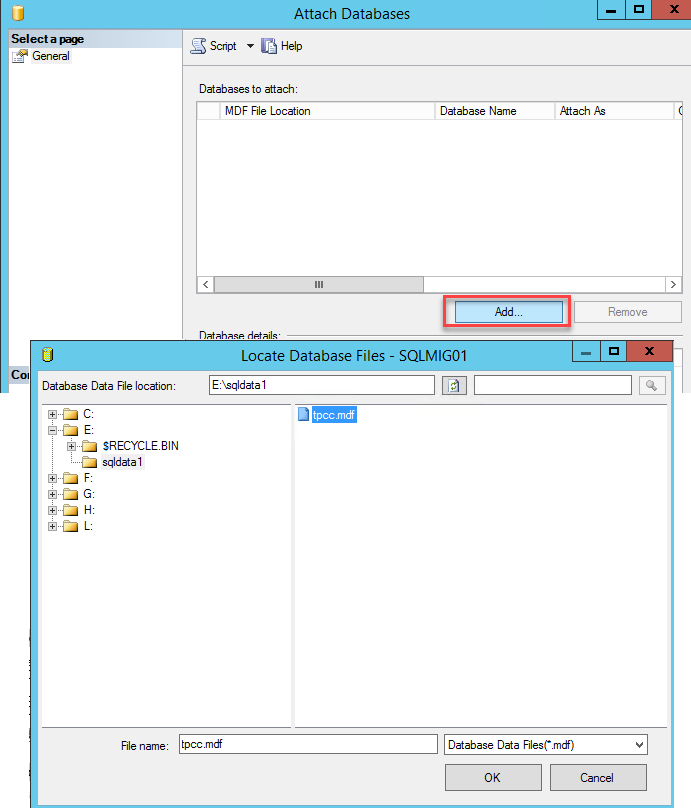
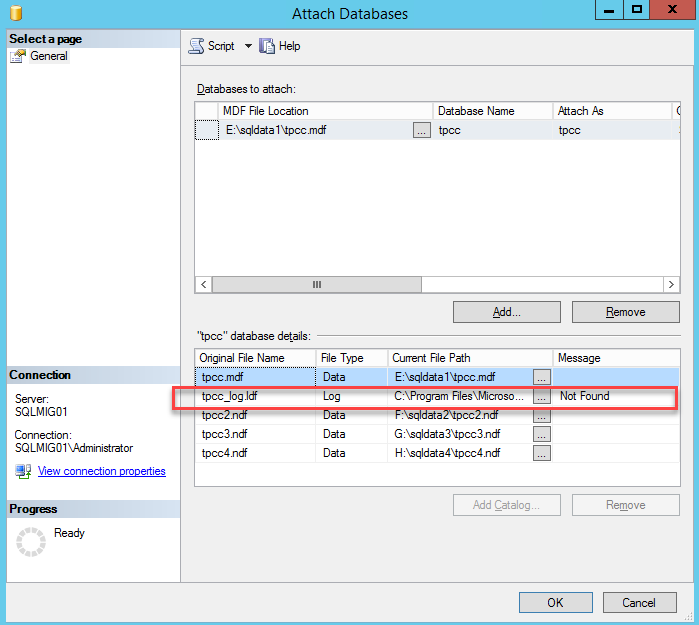
Now we simply reattach the database specifying the new location of the *.mdf file. You will note the message highlighted below which indicates the log files are not found which is expected since we have just relocated them.
To resolve this simply update the path to the logs file as shown below and press Ok.
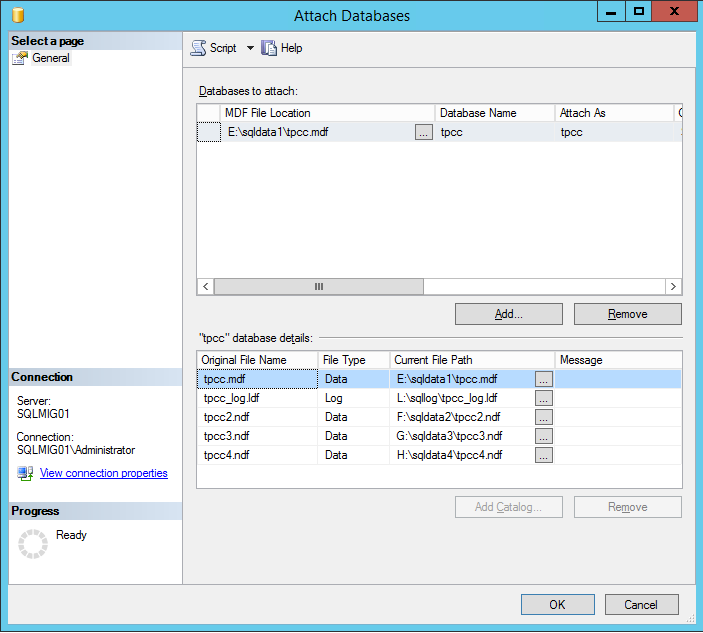
And we’re done! Simple as that.
Adjust the maximum growth of the datafile to an appropriate size. If you set to unlimited, please ensure that you monitor the volumes and manage them according to the growth rate of the database.

Lastly, don’t forget to change the database recovery model to Full
Now you have your OS separated from your SQL database and logs and all of the drives are configured across four virtual SCSI controllers.
Summary:
If you have an existing SQL server and storage performance is considered a problem, before buying new storage (Nutanix or otherwise), ensure you optimize the virtual machines storage layout as the constraint may not be the underlying storage.
As this post explains, most of this optimization can be done without taking the database offline so you don’t really have anything lose in following this process. Worst case scenario is performance does not improve and you have eliminated the VM storage as the constraining factor and when you do implement new Nutanix nodes or any underlying storage, you will get the most out of it. Do follow some other best practices like RAM to vCPU balancing, SQL Memory optimization, Trace Flags and database compression, be it row or page.
Acknowledgements:
A huge thank you to Kasim Hansia from the Nutanix Business Critical Applications (vBCA) team for documenting this process and allowing me to publish this post using his screenshots. It’s a pleasure working with such a talented group at Nutanix both in the vBCA team and in the broader organization.
Related Articles: