Solving Oracle & SQL Licensing challenges with Nutanix

The Nutanix platform has and will continue to evolve to meet/exceed the ever increasing customer and application requirements while working within constraints such as licensing.

Two of the most common workloads which I work frequently with customers to design solutions around real or perceived licensing constraints are Oracle and SQL.

In years gone by, Nutanix solutions were constrained to being built around a limited number of node types. When I joined in 2013 only one type existed (NX-3450) which limited customers flexibility and often led to paying more for licensing than a traditional 3-tier solution.

With that said, the ROI and TCO for the Nutanix solutions back then were still more often than not favourable compared to 3-tier but these days we only have more and more good news for prospective and existing customers.

Nutanix has now rounded out the portfolio with the introduction of “Compute Only” nodes to target a select few niche workloads with real or perceived licensing and/or political constraints.

Compute only nodes compliment the traditional HCI nodes (Compute+Storage) as well as our unique Storage Only Nodes which were introduced in mid 2015.

So how do Compute Only nodes help solve these licensing challenges?

In short, Oracle leads the world in misleading and intimidating customers into paying more for licensing than what they need to. One of the most ridiculous claims is “You must license every physical CPU core in your cluster because Oracle could run or have ran on it”.

The below tweet makes fun of Oracle and shows how ridiculous their claim that customers need to license every node in a cluster (which I’ve never seen referenced in any actual contract) is.

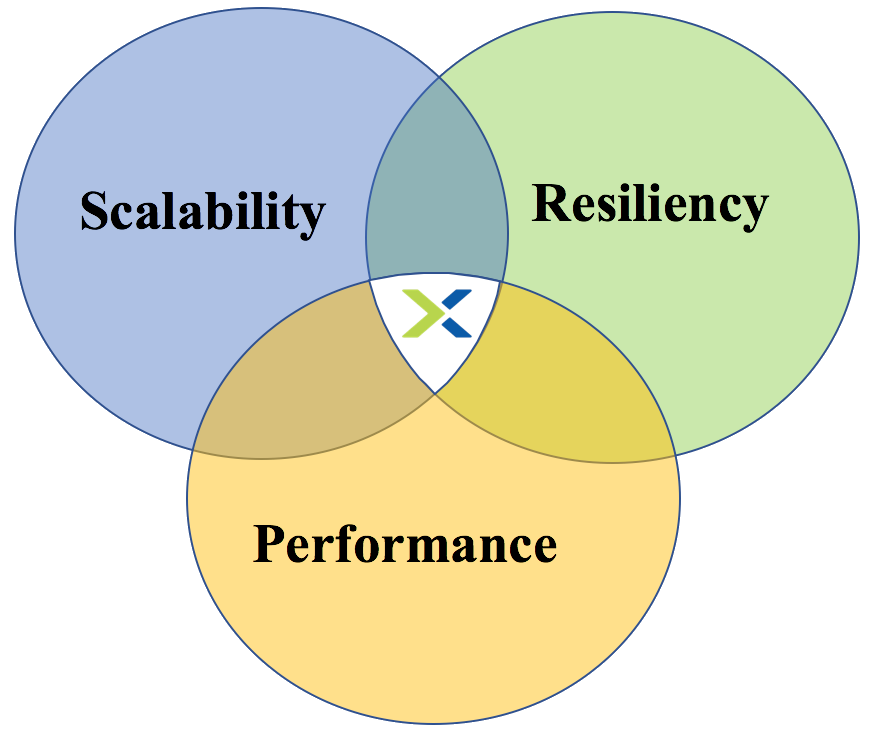
So let’s get to how you can design a Nutanix solution to meet a typical Oracle customer licensing constraint while ensuring excellent Scalability, Resiliency and Performance.

At this stage we now assume you’ve given your first born child and left leg to Oracle and have subsequently been granted for example 24 physical core licenses from Oracle, what next?

If we we’re to use HCI nodes, some of the CPU would be utilised by the Nutanix Controller VM (CVM) and while the CVM does add a lot of value (see my post Cost vs Reward for the Nutanix Controller VM) you may be so constrained by licensing that you want to maximise the CPU power for just Oracle workloads.

Now in this example, we have 24 licensed physical cores, so we could use two Compute Only nodes using an Intel Gold 6128 [6 cores / 3.4 GHz] / 12 cores per server for 24 total physical cores.

Next we would assess the storage capacity, resiliency and performance requirements and decide how many and what configuration storage only nodes are required.

Because Virtual Machines cannot run on storage only nodes, the Oracle Virtual Machines cannot and will never run on any other CPU cores other than the two Compute Only nodes therefore you would be in compliance with your licensing.

The below is an example of what the environment could look like.

2CO_4SOnodes

SQL has ever changing CPU licensing models which in some cases are licensed by server or vCPU count, Compute Only can be used in the same way I explained above to address any SQL licensing constraints.

What about if I need to scale storage capacity and/or performance?

You’re in luck, without any modifications to the Oracle workloads, you can simply add one or more storage only nodes to the cluster and it will almost immediately increase capacity, performance and resiliency!

I’ve published an example of the performance improvement by adding storage only nodes to a cluster in an article titled Scale out performance testing with Nutanix Storage Only Nodes which I wrote back in 2016.

In short, the results show by doubling the number of nodes from 4 to 8, the performance almost exactly doubled while delivering low read and write latency.

What if you’ve already invested in Nutanix HCI nodes (example below) and are running Oracle/SQL or any other workloads on the cluster?

TypicalHCIcluster

Nutanix provides the ability to convert a HCI node into a Storage Only node which results in preventing Virtual Machines from running on that node. So all you need to do is add two or more Compute Only nodes to the cluster, then mark the existing HCI nodes as Storage Only and the result is shown below.

CO_PlusConvertedHCI

This is in fact the minimum supported configuration for Compute Only Environments to ensure minimum levels of resiliency and performance. For more information, check out my post “Nutanix Compute Only Minimum requirements“.

Now we have two nodes (Compute Only) which can run Virtual Machines and four nodes (HCI nodes converted to Storage Only) which are servicing the storage I/O. In this scenario, if the HCI nodes have unused CPU and/or RAM the Nutanix Controller VM (CVM) can also be scaled up to drive higher performance & lower latency.

Compute Only is currently available with the Nutanix Next Generation Hypervisor “AHV”.

Now let’s cover off a few of the benefits of running applications like Oracle & SQL on Nutanix:

  1. No additional Virtualization licensing (AHV is included when purchasing Nutanix AOS)
  2. No rip and replace for existing HCI investment
  3. Unique scale out distributed storage fabric (ADSF) which can be easily scaled as required
  4. Storage Only nodes add capacity, performance and resiliency to your mission critical workloads without incurring additional hypervisor or application licensing costs
  5. Compute Only allows scale up and out of CPU/RAM resources where applications are constrained by ONLY CPU/RAM and/or application software licensing.
  6. Storage Only nodes can also provide functions such as Nutanix Files (previously known as Acropolis File Services or AFS)

As a result of Nutanix now having HCI, Storage Only and Compute Only nodes, we’re now entering the time where Nutanix can truely be the standard platform for almost any workload including those with non technical constraints such as political or application licensing which have traditionally been at least perceived to be an advantage for legacy SAN products.

The beauty of the Nutanix examples above is while they look like a traditional 3-tier, we avoid the legacy SAN problems including:

1. Rip and Replace / High Impact / High Risk Controller upgrades/scalability
2. Difficulty in scaling performance with capacity
3. Inability to increase resiliency without adding additional Silos of storage (i.e.: Another dual controller SAN)

With Compute Only being supported by AHV, we also help customers avoid the unnecessary complexity and related operational costs of managing ESXi deployments which have become increasingly more complex over time without significantly improving value to the average customer who simply wants high performance, resilient and easy to manage virtualisation solution.

But what about VMware ESXi customers?

Obviously moving to AHV would be ideal but for those who cannot for whatever reasons can still benefit from Storage Only nodes which provide increased storage performance and resiliency to the Virtual machines running on ESXi.

Customers can run ESXi on Nutanix (or OEM / Software Only) HCI nodes and then scale the clusters performance/capacity with AHV based storage only nodes, therefore eliminating the need to license both ESXi and Oracle/SQL since no virtual machine will run on these nodes.

How does Nutanix compare to a leading all flash array?

For those of you who would like to see a HCI only Nutanix solution have better TCO as well as performance and capacity than a leading All Flash Array, checkout A TCO Analysis of Pure FlashStack & Nutanix Enterprise Cloud where even with giving every possible advantage to Pure Storage, Nutanix still comes out on top without data reduction assumptions.

Now consider that Nutanix the TCO as well as performance and capacity was better than a leading All Flash Array with only HCI nodes, imagine the increased efficiency and flexibility by being able to mix/match HCI, with Storage Only and Compute only.

This is just another example of how Nutanix is eliminating even the corner use cases for traditional SAN/NAS.

For more information about Nutanix Scalability, Resiliency and Performance, checkout this multi-part blog series.

Identifying & Resolving Excessive CPU Overcommitment (vCPU:pCore ratios)

Help! My performance is terrible and my consultant/vendor says it’s due to high/excessive CPU overcommitment! What do I do next?

Question: “How much CPU overcommitment is ok?”.

The answer is of course “It depends” and there are many factors including but not limited to, workload type, physical CPUs and how complimentary the workloads (other VMs) are.

Other common questions include:

“How much overcommitment do I have now?”

&

“How do I know if overcommitment is causing a performance problem?”.

Let’s start with “How much overcommitment do I have now?”.

With Nutanix this is very easy to work out, first goto the Hardware page in PRISM and click Diagram, then select one of your nodes as shown below.

PRISMHWDiagram

Once you’ve done that you will see below in the “Summary” section the CPU Model, No. of CPU Cores and No. of Sockets as shown below.

HostDetailsPRISMCPUHW

In this case we have 2 sockets and 20 cores total for a total of 10 physical cores per socket.

If you have multiple node types in your cluster, repeat this step for each different node type in your cluster. Then simply add up the total number of physical cores in the cluster.

In my example, I have three nodes, each with 20 cores for a total of 60 physical cores.

Next we need to find out how many vCPUs we’ve provisioned in the cluster. This can be found on the “VMs” page in PRISM as shown below.

ProvisionedvCPUsPRISM

So we have our 3 node cluster with 60 physical cores (pCores) and we have provisioned 130 vCPUs.

Now we can input the details into my vSphere Cluster Sizing Calculator and work out the overcommitment including our desired availability level (in my case, N+1) and we get the following:

ClusterSizingCalc2

The calculator is designed to be conservative and show information assuming the resources (CPU/RAM) required for the configured availability level are removed from the calculation. Put simply, the vCPU:pCore ratio assumes the N+1 host is not in the cluster which is how I personally size environments, especially for business critical applications.

The calculator shows us we have a 3.25:1 vCPU:pCore ratio.

For business critical applications like SQL, Exchange, Oracle, SAP etc, I always recommend sizing without CPU overcommitment (so <= 1:1) and ensuring the VMs are right sized to avoid poor performance and wasted resources.

Now that we know our overcommitment ratio, what’s next?

We need to find out if our overcommitment level is consistent with our original design and assess how the Virtual Machines are performing in the current state. A good design should call out the application requirements and critical performance factors such as CPU overcommitment and VM placement (e.g.: DRS Rules).

“How do I know if overcommitment is causing a performance problem?”.

One of the best ways to measure if a VM has CPU scheduling contention is by looking at “CPU Ready” or “Stolen time” in the AHV (or KVM) world.

CPU ready is basically the delay between time when the VM requests to be scheduled onto CPU cores and the time when it’s actually scheduled. One of the easiest way’s to present this is in a percentage of total time that the VM is waiting to be scheduled.

How Much CPU Ready is OK? My rule of thumb is:

<2.5% CPU Ready
Generally No Problem.

2.5%-5% CPU Ready
Minimal contention that should be monitored during peak times

5%-10% CPU Ready
Significant Contention that should be investigated & addressed

>10% CPU Ready
Serious Contention to be investigated & addressed ASAP!

With that said, the impact of CPU Ready will vary depending on your application so even 1% should not be ignored especially for business critical applications.

As CPU Ready is a critical performance metric, Nutanix decided to display this in PRISM on a per VM basis so customers can easily identify CPU scheduling contention.

Below we see the summary of a VMs performance which can be found on the VM’s page in PRISM after highlighting a VM. At the bottom of the page we see a graph showing CPU Ready.

VMPerformanceNTNXPRISM

CPU Ready of <2.5% is unlikely to be causing major issues for the majority of VMs, but in some latency sensitive applications like databases or video/voice, 2.5% could be causing noticeable issues so never disregard looking into CPU ready in your troubleshooting.

I recommend looking at a VM and if it’s showing even minimal CPU ready is say >1% and it’s a business critical application, follow the troubleshooting steps in this article until CPU Ready is <0.5% and measure the performance difference.

Key Point: If you have applications like SQL Always on availability groups, Oracle RAC or Exchange DAGs, one VM suffering CPU Ready will likely be having a flow on impact to the other VMs trying to communicate (or replicate) to it. So ensure all “dependancies” for your VM/app are not suffering CPU Ready before looking into other areas.

In short, Server A with no CPU Ready can be impacted when trying to communicate to Server B and being delayed because Server B has High CPU Ready.

The reason I bring this up is because it’s important not to get tunnel vision when looking at performance problems.

Now to the fun part, Troubleshooting/Resolutions to CPU Ready!

  1. Right size your VMs

Do NOT ignore this step! Your CPU overcommitment ratio is irrelevant, Right Sizing will always improve the efficiency and performance of your VMs. There is an increasing overhead at the hypervisor layer for scheduling more vCPUs, even with no overcommitment so ensure VMs are not oversized.

A common misconception is that 90% CPU utilisation is a bottleneck, in fact this can be a sign of a right sized VM. We need to ensure vCPUs are sized for peaks but unless a VM is pinned at 100% CPU for long periods of time, a short spike to 100% is not necessarily a problem.

Here is an example of the benefits of VM right sizing.

Once you have right sized your VMs, move onto step 2.

2. Size or place VMs within NUMA boundaries

First what is a NUMA boundary? It’s pretty simple, take the number of cores and divide by the number of sockets and that’s the NUMA boundary and also the maximum number of vCPUs a VM can be if you wish to benefit from maximum memory performance and optimal CPU scheduling.

The total host RAM is also a factor so divide the total RAM by the number of sockets and that’s the maximum RAM a VM can be assigned without breaching the NUMA boundary and paying an approx 30% performance penalty on memory performance.

Example: I had a customer who had MS Exchange running with 12vCPU / 96GB VMs on Nutanix nodes with 12 cores per socket. Exchange was running poorly (in the end due to a MS bug) but they insisted the problem was insufficient CPU. So they forced the customer to increase the VM to 18 vCPUs.

This did not solve the performance problem AND in fact made performance worse as the VM now suffered from very higher CPU Ready as VMs larger than a NUMA boundary can experience much higher CPU ready especially on hosts running other workloads. Moving back to 12 vCPUs relieved the CPU Ready and then Microsoft ultimately resolved the case with a patch.

3. Migrate other VMs off the host running the most critical VM

This is a really easy step to alleviate CPU scheduling contention and allows you to monitor the performance benefit of not having CPU overcommitment.

If the virtual machines performance improves you’ve likely found at least one of the causes of the performance problem. Now comes the harder part. Unless you can afford to have a single VM per host, you now need to identify complimentary workloads to migrate back onto the host.

What’s a complimentary workload? 

I’m glad you asked! Let me give you an example.

Let’s say we have a 10vCPU / 128GB RAM SQL Server VM which is right sized (of course) and our host is the NX-8035-G4 with 2 sockets of 10 cores per socket (20 cores total) and 256GB RAM. Being SQL we’ll also assume it has high IO requirements as it’s the backend for a business critical application.

Being Nutanix we also have a Controller VM using some resources (say 8vCPUs and 32GB RAM). For those who are interested see: Cost vs Reward for the Nutanix Controller VM (CVM)

A complimentary workload would have one or more of the following qualities:

a) Less than 96GB RAM (Host RAM 256GB, minus SQL VM 128GB, minus CVM 32GB = 96GB remaining)

b) vCPU requirements <= 2 (This would mean a 1:1 vCPU:pCore ratio)

c) Low vCPU requirements and/or utilization

d) Low IO requirements

e) Low capacity requirements (this would maximise the amount of SQL data which would remain local to the node for maximum read performance with data locality).

f) A workload which uses CPU/Storage at a different time of the day to the SQL workload.

e.g.: SQL might be busy 8am to 6pm, but workload may drop significantly outside those hours. A VM with high CPU/Storage IO requirements that runs from 7pm to midnight would potentially be a very complimentary workload as it would allow higher overcommitment and with minimal/no performance impact due to the hours of operation of the VMs not overlapping.

4. Migrate the VM onto a node with more physical cores

This might be an obvious one but a node with more physical cores has more CPU scheduling flexibility which can help reduce CPU Ready. Even without increasing the vCPUs on the VM, the VM has a better chance of getting time on the physical cores and therefore should perform better.

5. Migrate the VM onto a node with a higher CPU clock-rate

Another somewhat obvious one but it’s very common for vendors and customers to quote the number of vCPUs as a requirement when a “vCPU” is not a unit of measurement. A vCPU at best with no overcommitment is equal to one physical core and it goes downhill for there. Physical cores also vary in clock-rate (duh!) so a faster clock rate can have a huge impact on performance especially for those pesky single threaded applications.

Note: CPUs with higher clock rates typically have fewer cores, so don’t make the mistake of moving a VM to a node where it exceeds the NUMA boundary!

6. Turn OFF advanced power management on the physical server & use “High Performance” as your policy (in ESXi)

Advanced Power Management settings can save power and in some cases have minimal impact on performance, but when troubleshooting performance problems, especially around business critical applications, I recommend eliminating Power Management as a potential cause and once the performance problem is resolved, test re-enabling it if you desire.

7. Enable Hyperthreading (HT)

Hyperthreads can provide significant CPU scheduling advantages and in many cases improve performance despite a hyperthreading providing generally fairly low overall performance (typically 10%-30%) in CPU benchmarks.

Long story short, a VM in a Ready state is doing NOTHING, so enabling HT can allow it to be doing SOMETHING, which is better than NOTHING!

Also hypervisors are pretty smart, they preferentially schedule vCPUs to pCores so the busy VMs will more often than not be on pCores while the VMs with low vCPU requirements can be scheduled to hyperthreads. Win/Win.

Note: Some vendors recommend turning HT off, such as Microsoft for Exchange. But, this recommendation is really only applicable to Exchange running on physical servers. For virtualization always, always leave HT enabled and size workloads like Exchange with 1:1 vCPU to pCore ratios, then you will achieve consistent, high performance.

For anyone struggling with a vendor (like Microsoft) who is insisting on disabling HT when running business critical apps, here is an Example Architectural Decision on Hyperthreading which may help you.

Example Architectural Decision – Hyperthreading with Business Critical Applications (Exchange 2013)

8. Add additional nodes to the cluster

If you have right sized, migrated VMs to nodes with complimentary workloads, ensured optimal NUMA configurations, ensured critical VMs are running on the highest clock-rate CPUs etc and you’re still having performance problems, it may be time to bite the bullet and add one or more nodes to the cluster.

Additional nodes provide more CPU cores and therefore more CPU scheduling opportunities.

A common question I get is “Why can’t I just use CPU reservations on my critical VMs to guarantee them 100% of their CPU?”

In short, using CPU reservations does not solve CPU ready, I have also written an article on this topic – Common Mistake – Using CPU reservations to solve CPU ready

Wildcard: Add storage only nodes

Wait, what? Why would adding storage only nodes help with CPU contention?

It’s actually pretty simple, lower latency for read/write IO means less CPU WAIT which is the time the CPU is “waiting” for an IO to complete.

e.g.: If an I/O takes 1ms on Nutanix but 5ms on a traditional SAN, then moving the VM to Nutanix will mean 4ms less CPU WAIT for the VM, which means the VM can use it’s assigned vCPUs more efficiently.

Adding storage only nodes (even where the additional capacity is not required) will improve the average read/write latency in the cluster allowing VMs to be scheduled onto a physical core, get the work done, and release the pCore for another VM or to perform other work.

Note: Storage only nodes and the way data is distributed throughput the cluster is a unique capability for Nutanix. See the following article for an example on how performance is improved with storage only nodes with NO modification required to the VMs/Apps.

Scale out performance testing with Nutanix Storage Only Nodes

Summary:

There are a lost of things we can do to address CPU Ready issues, including thinking outside the box and enhancing the underlying storage with things like storage only nodes.

Other articles on CPU Ready

1. VM Right Sizing – An Example of the benefits

2. How Much CPU Ready is OK?

3. Common Mistake – Using CPU Reservations to solve CPU Ready

4. High CPU Ready with Low CPU Utilization

Nutanix | Scalability, Resiliency & Performance | Index

In my opinion there are three key areas for a solution such as the Nutanix platform to deliver consistent successful business outcomes.

They are of course Scalability, Resiliency and Performance.

ScalabilityResiliencyPerformanceIf a product is strong in just one of these areas and weak in the other two, put simply it’s very unlikely to be a minimally viable product.

Even two out of three isn’t enough, you need a product which delivers all three to a high standard if you want to have a successful business outcome.

For example, if you have a product which performs well, but doesn’t scale then a customer who has the potential of growth should not consider that product. If a product is very scalable but isn’t resilient is unlikely to be suitable for any production workloads and if a solution is resilient but not scalable, then again we have major constraints which make it unattractive in most if not all scenarios.

I’ve previously written about “Things to consider when choosing infrastructure” where I discussed avoiding silos and by combining workloads on a modern platform like Nutanix, the environment can be more performant, resilient and obviously scalable.

When you have a product or product/s which have all three of these qualities, you are very likely to be able to deliver a great business outcome.

I’ve previously compared “peak” performance with “real world” performance where I concluded among other things that “Peak performance is rarely a significant factor for a storage solution” and even though it’s very common when doing proof of concepts (POCs), “Do not waste time performing absurd testing of “Peak performance”.

The purpose of this series is to demonstrate how the Nutanix platform performs in all three areas and to show examples to help prospective customers make informed decisions.

These three areas are my primary focus day to day in my role as Principal Architect at Nutanix and I am working to ensure the core of the Nutanix platform continues to improve equally in all areas.

Readers of this series will notice that many of the posts will refer to back to each other and in many cases cover similar areas. This is deliberate as Scalability, Resiliency and Performance are tied together and essential for an enterprise grade solution.

This series will continue to be updated as new capabilities, enhancements etc are released.

I hope this series is informative and helps existing/prospective customers as well as industry analysts learn more about the evolving Nutanix platform.

Scalability

Part 1 – Storage Capacity
Part 2 – Compute (CPU/RAM)
Part 3 – Storage Performance for a single Virtual Machine
Part 4 – Storage Performance for Monster VMs with AHV!
Part 5 – Scaling Storage Performance for Physical Machines

More coming soon.

Resiliency

Index:
Part 1 – Node failure rebuild performance
Part 2 – Converting from RF2 to RF3
Part 3 – Node failure rebuild performance with RF3
Part 4 – Converting RF3 to Erasure Coding (EC-X)
Part 5 – Read I/O during CVM maintenance or failures
Part 6 – Write I/O during CVM maintenance or failures
Part 7 – Read & Write I/O during Hypervisor upgrades
Part 8 – Node failure rebuild performance with RF3 & Erasure Coding (EC-X)
Part 9 – Self healing
Part 10: Nutanix Resiliency – Part 10 – Disk Scrubbing / Checksums

Bonus: Sizing Nutanix for Resiliency with Design Brews

More coming soon.

Performance

Part 1 – Coming soon.

Referenced Posts:

Things to consider when choosing infrastructure
Enterprise Architecture & Avoiding tunnel vision
Peak performance vs Real World Performance