Why Nutanix Acropolis hypervisor (AHV) is the next generation hypervisor – Part 1 – Introduction

Before I go into the details of why Acropolis Hypervisor (AHV) is the next generation of hypervisor, I wanted to quickly cover what the Xtreme Computing Platform is made up of and clarify the product names which will be discussed in this series.

In the below picture we can see Prism which is a HTML 5 based user interface sits on top of Acropolis which is a Distributed Storage and Application Mobility across multi-hypervisors and public clouds.

At the bottom we can see the currently support hardware platforms from Supermicro and Dell (OEM) but recently Nutanix has announced an OEM with Lenovo which expands customer choice further.

Please do not confuse Acropolis with Acropolis Hypervisor (AHV) as these are two different components, Acropolis is the platform which can run vSphere, Hyper-V and/or the Acropolis Hypervisor which will be referred to in this series as AHV.
nutanixxcp2

I want to be clear before I get into the list of why AHV is the next generation hypervisor that Nutanix is a hypervisor and cloud agnostic platform designed to give customers flexibility & choice.

The goal of this series is not trying to convince customers who are happy with their current environment/s to change hypervisors.

The goal is simple, to educate current and prospective customers (as well as the broader market) about some of the advantages / values of AHV which is one of the hypervisors (Hyper-V, ESXi and AHV) supported on the Nutanix XCP.

Here are my list of reasons as to why the Nutanix Xtreme Computing Platform based on AHV is the next generation hypervisor/management platform and why you should consider the Nutanix Xtreme Computing Platform (with Acropolis Hypervisor a.k.a AHV) as the standard platform for your datacenter.

Why Nutanix Acropolis hypervisor (AHV) is the next generation hypervisor

Part 2 – Simplicity
Part 3 – Scalability
Part 4 – Security
Part 5 – Resiliency
Part 6 – Performance
Part 7 – Agility (Time to Value)
Part 8 – Analytics (Performance & Capacity Management)
Part 9 – Functionality (Coming Soon)
Part 10 – Cost

NOTE:  For a high level summary of this series, please see the accompanying post by Steve Kaplan, VP of Client Strategy at Nutanix (@ROIdude)
What if my VMs storage exceeds the capacity of a Nutanix node?

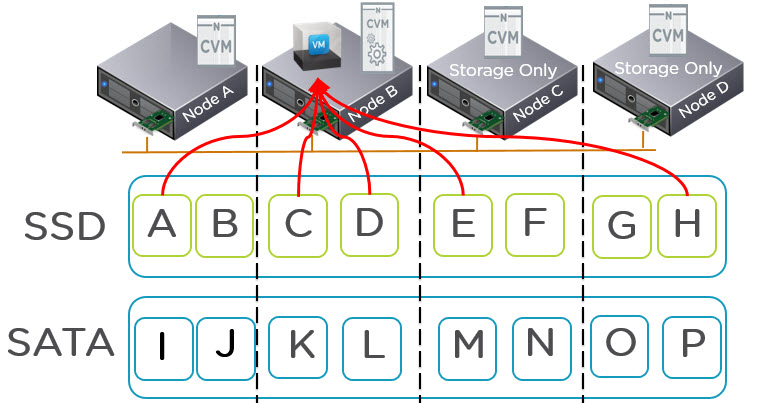
I get this question a lot, What if my VM exceeds the capacity of the node its running on. The answer is simple, the storage available to a VM is the entire storage pool which is made up of all nodes within the cluster and is not limited to the capacity of any single node.

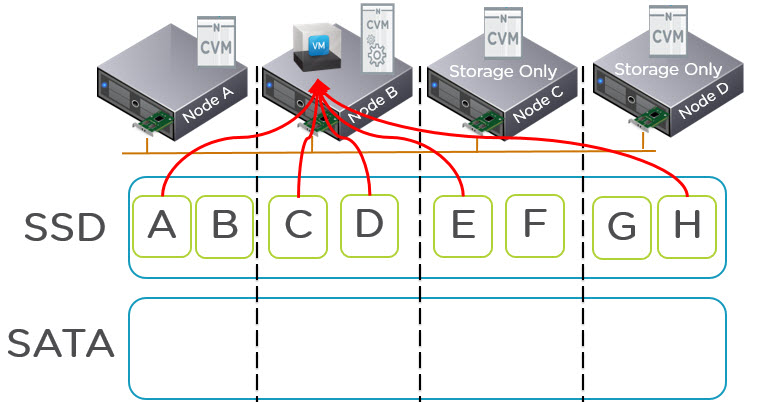
Let’s take an extreme example, a single VM is running on Node B (shown below) and all other nodes have no workloads. Regardless of if the nodes are “Storage only” such as NX-6035C or any Nutanix node capable of running VMs e.g.: NX3060-G4 the SSD and SATA tiers are shared.

AllSSDhybrid

The VM will write data to the SSD tier and only once the entire SSD tier (i.e.: All SSD in all nodes) reaches 75% capacity will ILM tier the coldest data off the to SATA tier. So if the SSD tier never reaches 75% you will have all data in SSD tier both local and remote.

This means multiple CVMs (Nutanix Controller VM) will service the I/O which allows for single VMs to achieve scale up type performance where required.

As the SSD tier exceeds 75% data is tiered down to SATA but active data will still reside in SSD tier across the cluster and be serviced with all flash performance.

The below shows there is a lot of data in the SATA tier but ILM is intelligent enough to ensure hot data remains in the SSD tier.

AllSSDwithColdData

Now what about Data Locality, Data Locality is maintained where possible to ensure the overheads of going across the network are minimized but simply put, if the active working set exceeds the local SSD tier Nutanix ensures maximum performance by distributing data across the shared SSD tier (not just two nodes for example) and services I/O through multiple controllers.

In the worst case where the active working set exceeds the local SSD capacity but fits within the shared SSD tier, you will have the same performance as a Centralised All Flash Array, in the best case, Data Locality will avoid the requirement to traverse the IP network and service reads locally.

If the active working set exceeds the shared SSD tier, Nutanix also distributes data across the shared SATA tier and services I/O from all nodes within the cluster as explained in a recent post “NOS 4.5 Delivers Increased Read Performance from SATA“.

Ideally I recommend sizing the Active working set of VMs to fit within the local SSD tier but this is not always possible. If you’re running Nutanix you can find out what the active working set of a VM is via PRISM (See post here) and if you’re looking to size for a Nutanix solution, use my rule of thumb for sizing for storage performance in the new world.

Uploading ISOs & VM Images to Acropolis Hypervisor (AHV)

A common question is how do I upload an ISO or Virtual machine image to the Acropolis Hypervisor, well in NOS 4.5 this task just got radically simpler.

The below shows the “Home” screen in PRISM UI. As we can see in the top left we are running the Acropolis Hypervisor (AHV) version 20150616.

By clicking the gear wheel at the top right, we can then access the “Image Configuration” menu.PRISMHomeImageService

The “Image configuration” menu is a quick and easy way to upload ISOs and Virtual Machine images to Acropolis.

Below we can see its a very simple process, simply give the Image a name along with annotation, select from a drop-down list the Image type, being ISO or Disk (RAW format, .img) and then select the image source, either from a URL or by uploading a file from your machine.

CreateImage

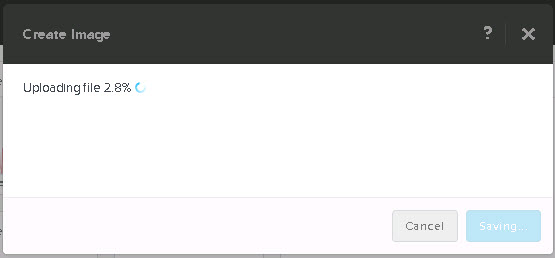
Once you have selected your ISO or Disk, hit save and the image will be uploaded and the status of the upload will be shown as per the below:

CreateImageUploading

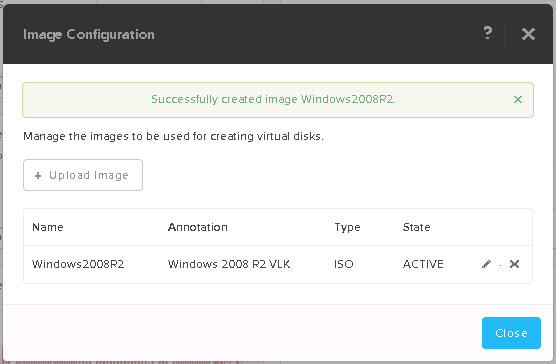
Once its completed, PRISM shows the following Summary:

ImageConfigurationSuccess

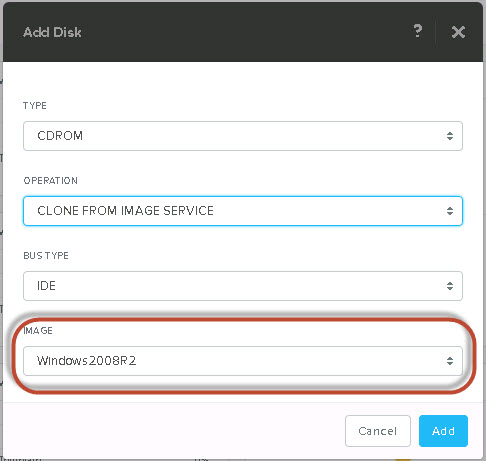
Now when you create a new VM, you will be able to select “Clone from Image Service” and select the ISO Image from a drop-down list. How simple is that!

CDROMimageservice

Simple as that! Now you can boot your VM and start using the ISO. The same process can also be used to upload VM disk images.